-
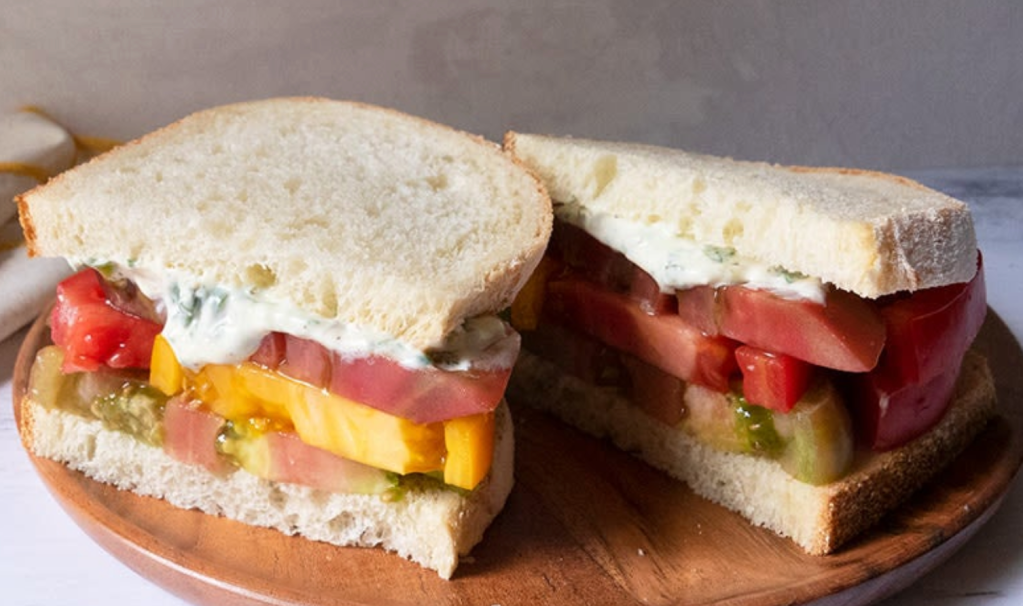
Heirloom Tomato Sandwich on San Francisco Sourdough & Fresh Basil Aioli!
Room temperature ingredients are best when making mayonnaise at home. The results are ultra creamy and so much more flavorful than anything you will purchase the grocer. A fresh tomato sandwich is the epitome of summer goodness—a sandwich so juicy you should eat it over the sink. Capture the experience…
-
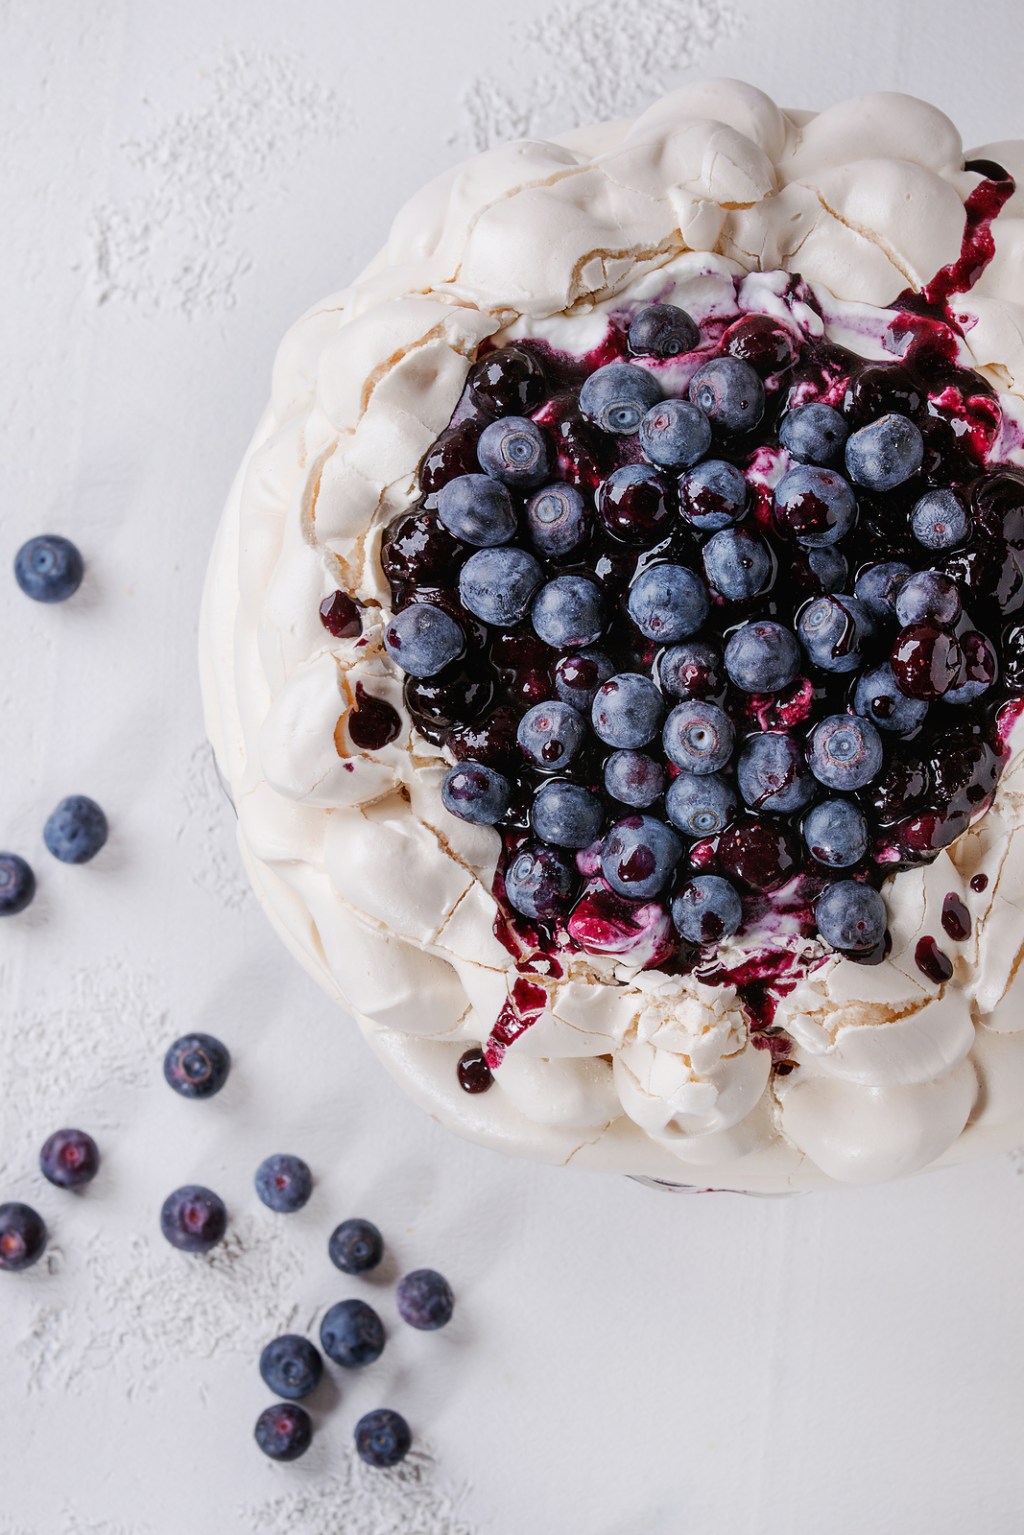
Delicious, Chocolate Blueberry Pavlova
Eau de brownie is the perfume, which can be deceived by the pale beige shade of the outer shell — yet inside; it is luscious like a truffle with the completion and texture that makes a perfect combination. You’ll Need : For the Meringue 6 large egg whites 1 1/2…
-

Individual Veggie Frittatas
Who has time for breakfast? You do, with these individual vegetable frittatas! You’ll need: 1/2 cup onion, small dice 1/2 cup red bell pepper, small dice 1 cup spinach, chopped 4 eggs 4 egg whites 2 tablespoons fresh chives, chopped 1 tomato, diced 1/4 to 1/2 teaspoon Italian seasoning…
-

Gingerbread Pancakes with Molasses Spiked Maple Syrup!
These pancakes that taste like you are eating gingerbread cookies for breakfast! So magical and delicious! They’re light, soft, fluffy with a pleasant boldness. Nicely spiced without being overwhelming. If you’re sensitive to these bold flavors like I am, tone them down a bit by adding less than the recipe…
-
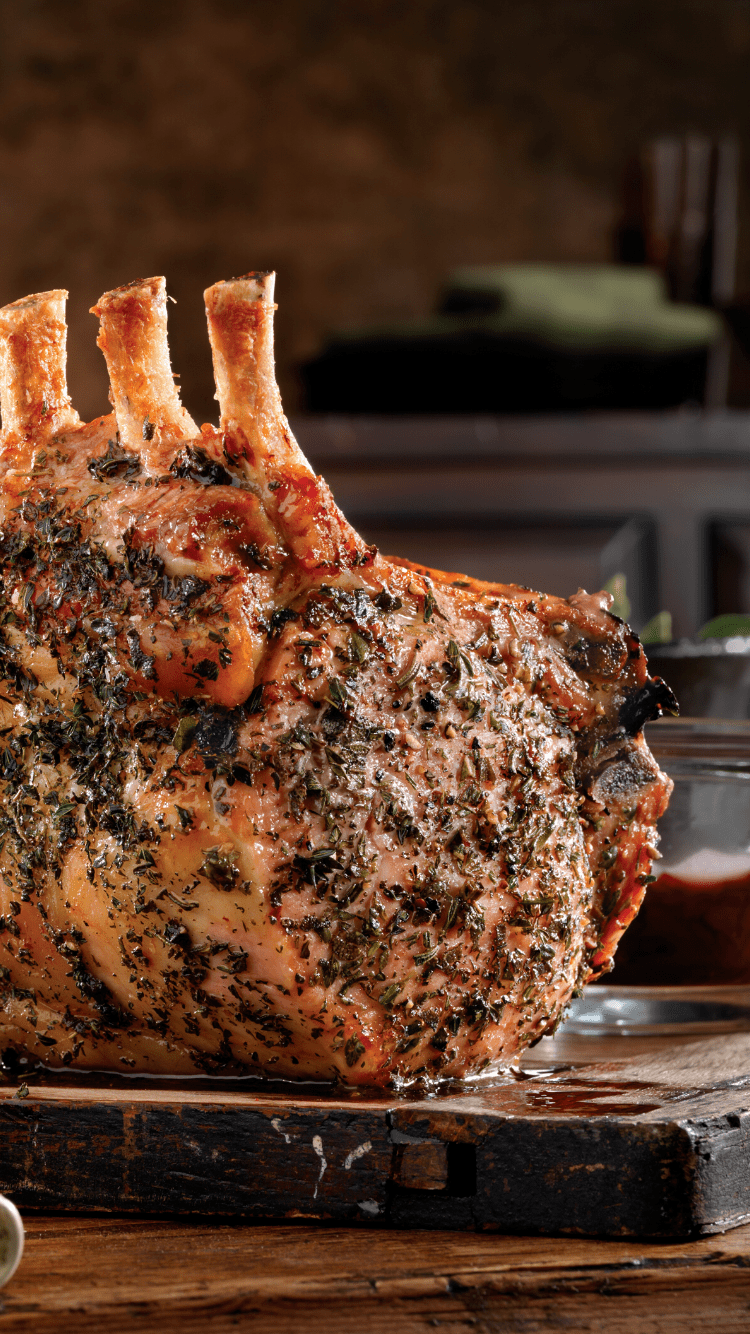
Traditional Herb Crusted Prime Rib with Red Wine Reduction!
A true prime rib that is labeled USDA Certified Prime, is heavily marbled with a generous amount of fat. These cuts are usually reserved for top restaurants and are hard to come by. It may be better to seek out a fine aged prime rib. Aged beef is similarly hard to find in the supermarket,…
-

Holiday Worthy Brioche Bread Pudding with Bourbon Butterscotch Sauce !
Ahhhh, bourbon and brioche. Two of my favorite things! You’ll Need: 1/4 cup bourbon 1/2 cup currants 1-1/2 pound loaf of Brioche, torn into 1-2 inch chunks, or cut into cubes – allowed to stale overnight 1 1/2 cups whole milk or substitute 1/2 cup heavy cream or…
-

GINGERBREAD: A SPICY HOLIDAY CLASSIC WITH A TWIST
Holiday Breakfast Recipe: Gingerbread Pancakes from Scratch !
-

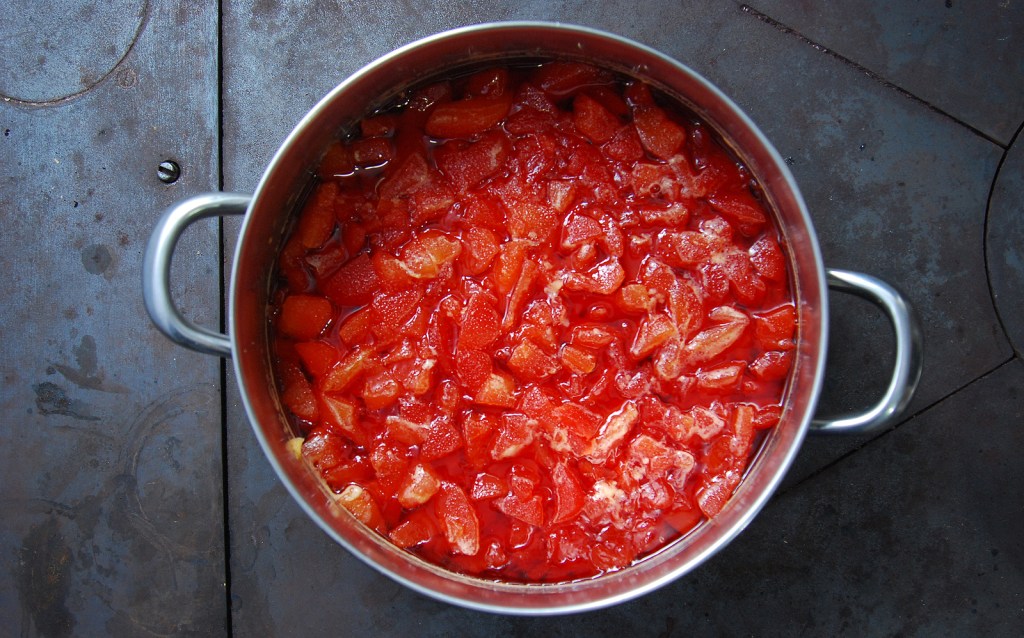
Homemade Heirloom Bloody Mary Mix
First, you need fresh seasonal tomatoes. Any tomatoes will do, but I prefer rich red heirlooms because they are large and extra juicy and meaty- not to mention low on seeds. Romas are fine, but they tend to be firmer and the juices released by the large, soft tomatoes are…
-

A Really Good Chocolate Chip Cookie
I’m excited to share my best chocolate chip cookie recipe today. This recipe has been honed and perfected over the years as I continuously strive to create the most delicious chocolate chip cookie you’ve ever tasted. It has been a journey filled with experimentation, learning, and satisfaction. Using browned butter…
-

Stained Glass Cookies
I use half of my cut-out cookie dough recipe to make these cookies, and the glass-like centers are created by melting hard candies in the oven. For variety, I also use gingerbread cookie dough. My kids loved making these in middle school; it’s as fun as a science project at…
-
Holiday Apple Pie Bars
Enjoy a buttery crust topped with spiced apples — all without the hassle of rolling out pie dough! This simple recipe features an easy dough perfect for the holidays. No one will ever guess that you pressed it into the bottom of your baking dish, serving as both the base…
-

Italian Fruit and Nut Holiday Biscotti
I don’t particularly appreciate dried fruits in my cookies, but I’m all about it when the holidays ring. Call me crazy, but here is just about the only cookie that gets baked twice—the beloved biscotti. This is a very versatile recipe, and as long as you keep the proportions comparable,…
-
Quince. What to do with this ugly-delicious forgotten winter fruit.
Let’s face it, Quince is not inviting. It’s tough, greenish yellow, and woody, and unlike myself, most people feel Quince is useless. But hold on! If you allow it, this old-world fruit will ripen to a floral, sweet with an amazing perfume that develops and continues to deepen in…
-

Peanut Butter Cookies
Peanuts rank high on the top ten allergen list so feel free to swap nut butters! These golden-blonde cookies are slightly soft, mildly chewy, and dense, with satisfying peanut butter taste! If you grind your own they will come out a little different, but still delicious. You’ll Need: 4 ounces…
-

What would the holiday season be without a dedicated cutout cookie recipe? #Reblog
Every baker needs a holiday cut out cookie recipe and one that won’t spread in the oven and holds its shape! Be sure to work quickly with this dough to maintain a manageable cool temperature. If the dough becomes too warm it will stick. Continue to keep dough cold, by…
-
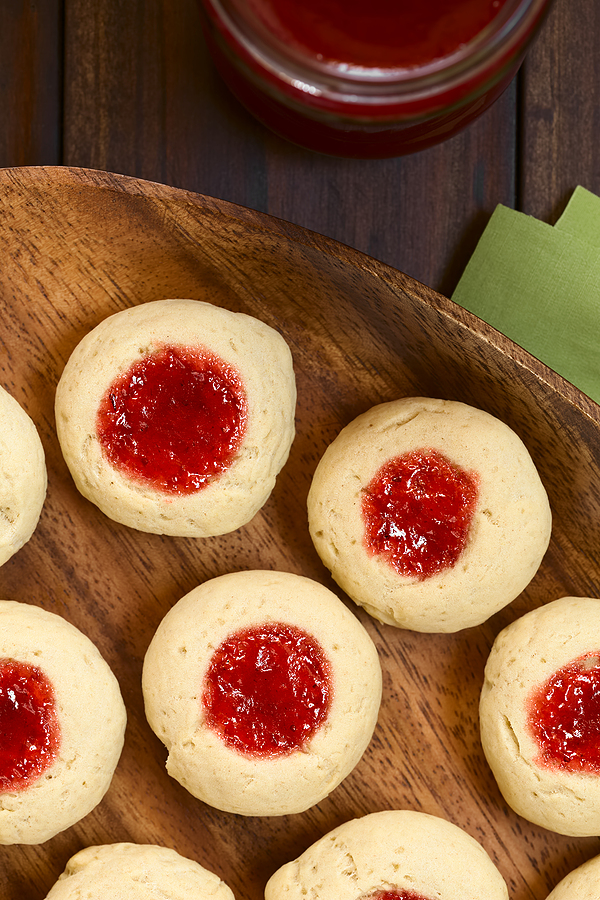
Thrumbprint Jam Cookies
These cookies remind me so much of my childhood. The delicious buttery cookie with baked gooey jam. Who needs anything more? Ok, maybe a drizzle of warm melted chocolate for an upgrade, but I love these just how they are! The entertaining part is applying your signature thumbprint. What fun!…
-
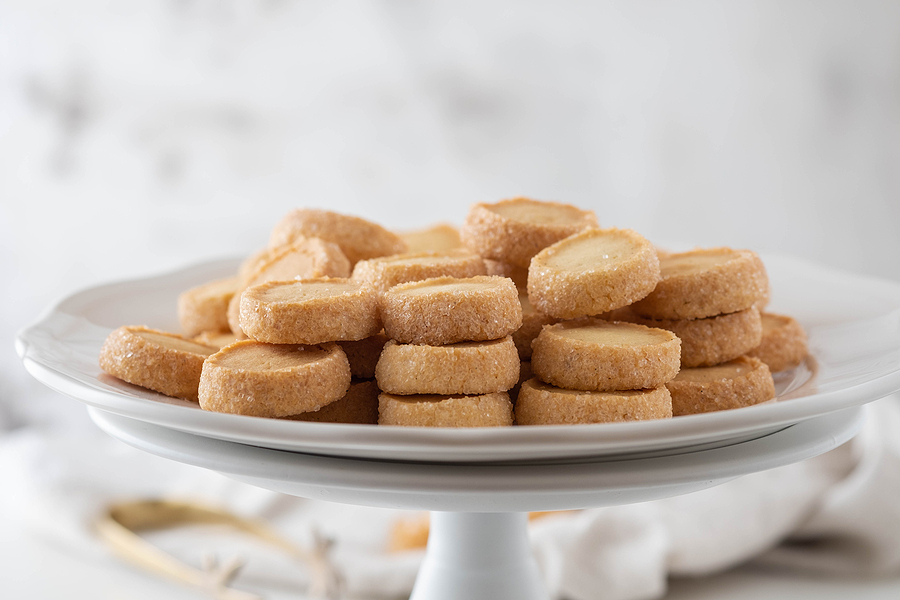
Holiday Shortbread Cookies
Shortbread cookies are rich and buttery, and have a crisp bite while still melting in your mouth! It’s such a classic, crumbly cookie recipe that only requires four ingredients. Use decorator colored sugars for a festive holiday touch! You’ll Need: 1 cup salted butter, room temperature 1 cup powdered sugar,…
-

Chocolate Swirled Chewy Meringues
It’s baking and sharing season, and I couldn’t be more excited about meringues! Let’s face it–anything made with sugar is my favorite. Adding chocolate; well, do I need to say more? These cookies are crispy, light, and melt on your tongue. They don’t have the thick, soft center of a…
-

Olive Oil Orange Cookies
These cookies are so delicious with the flavor of sweet winter oranges. I’m on a crazy kick— everything is orange this winter! Enjoy! You’ll Need: 1/4 cup olive oil 1 cup unsalted butter, softened 1/2 cup confectioners’ sugar, sifted 1/2 cup granulated sugar 1 large orange, zested and juiced; reserve…
-
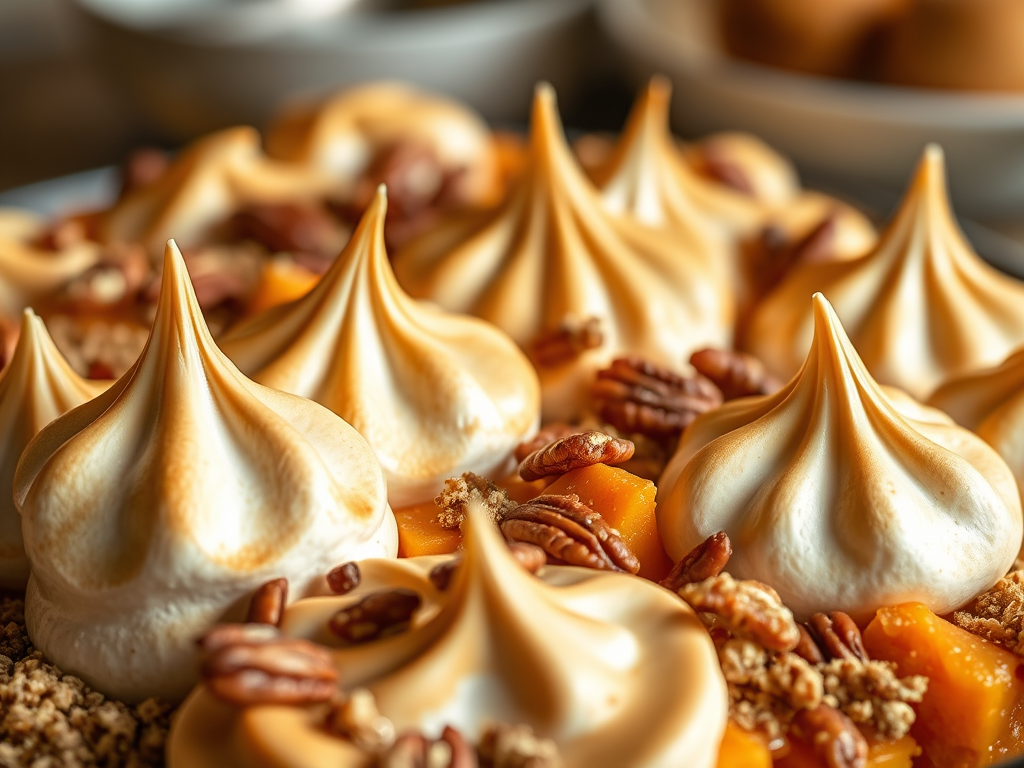
Sweet Potatoes with Pecan Streusel and Warm Meringue
This Sweet Potato dish is a killer side that brings warmth and joy to any holiday meal, yet its simplicity makes it perfect for anytime. The crunchy pecan and gooey topping adds a touch of sweetness that beautifully complements the caramelized oven-roasted sweet potatoes, creating a dish that transforms any…
-
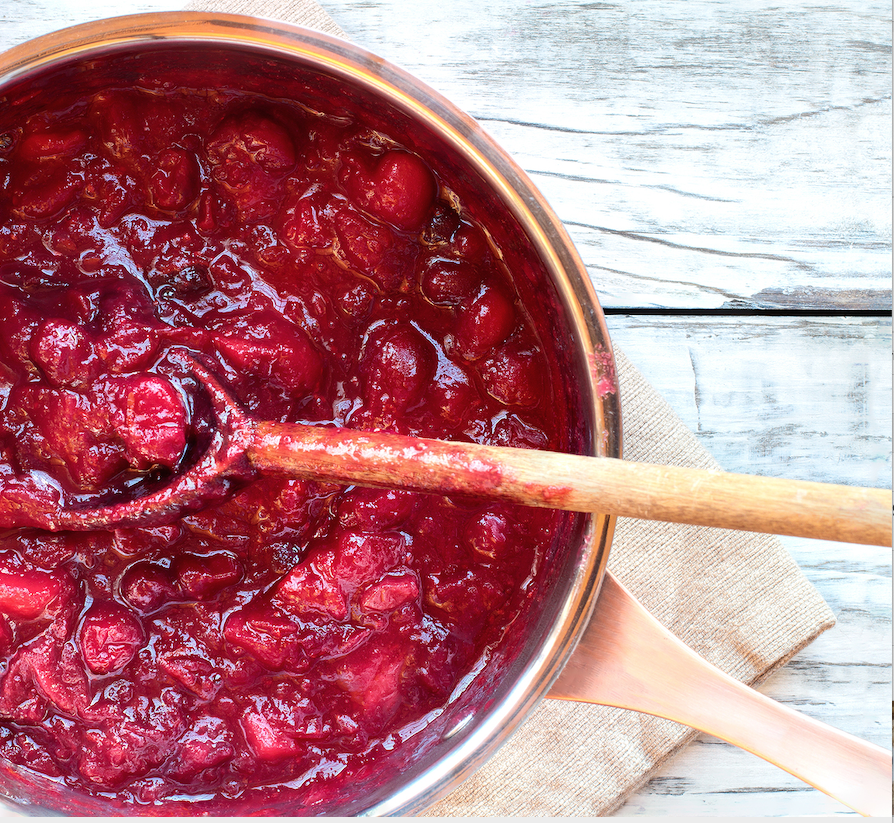
My Homemade Cranberry Sauce Recipe
This recipe has been in my culinary repertoire for over two decades. It’s my absolute favorite! Lose the canned cranberry sauce- trust me on this one. Just like everything Thanksgiving– it’s better the next day; especially smothered all over your leftover turkey sammy! There is quite a bit of sugar…
-
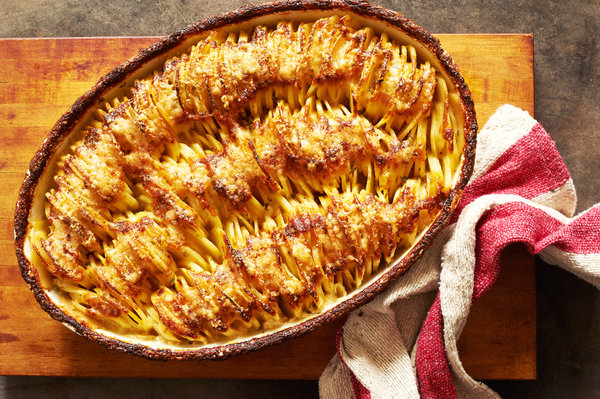
Hassleback Potato Casserole
This is a “mash-up” of a classic French gratin and a beautiful Hassleback potato recipe. The idea is to stand the potato slices vertically rather than lay them flat, ensuring each serving receives a creamy potato and a crispy edge in each bite. You’ll Need: 4 to 4 ½ pounds…
-

Poire à la Beaujolaise
Poire à la Beaujolaise translates to pear in wine and is a traditional dessert of the wine-growing region of Beaujolais, and one of the first menu items I ever dared to reproduce as a professional pastry chef while working in Sonoma, California. So very early in my career, and it turned out to be a…
-

Holiday Cheat Sheet- How Much to Shop, Cook and Serve!
As a professional chef, one of the most frequent questions I’m asked is how much food do you need to feed each guest? So, I decided to build a mini cheat sheet for the upcoming holiday season! Hope this helps! Every 2.4 pounds of food you donate creates a meal…
-
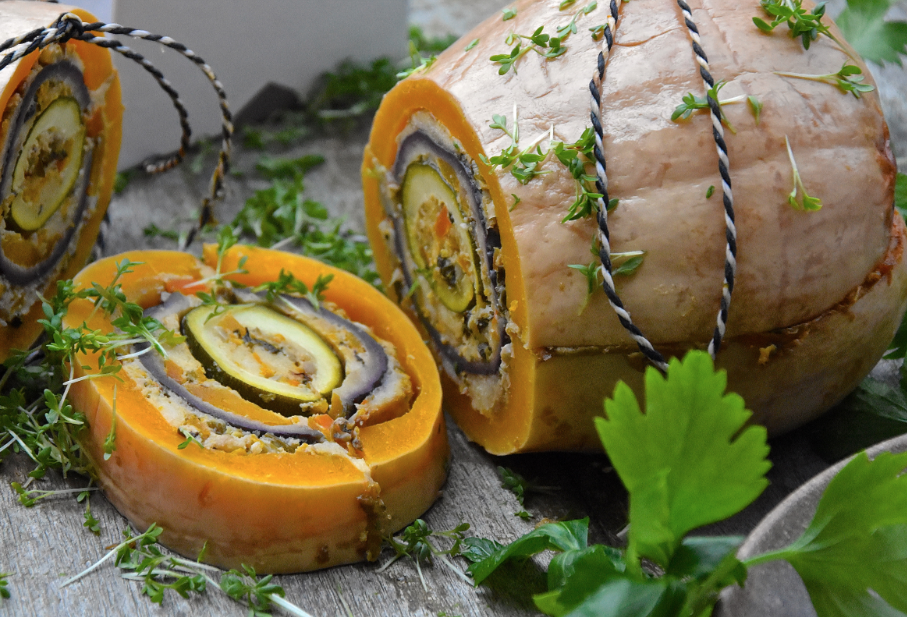
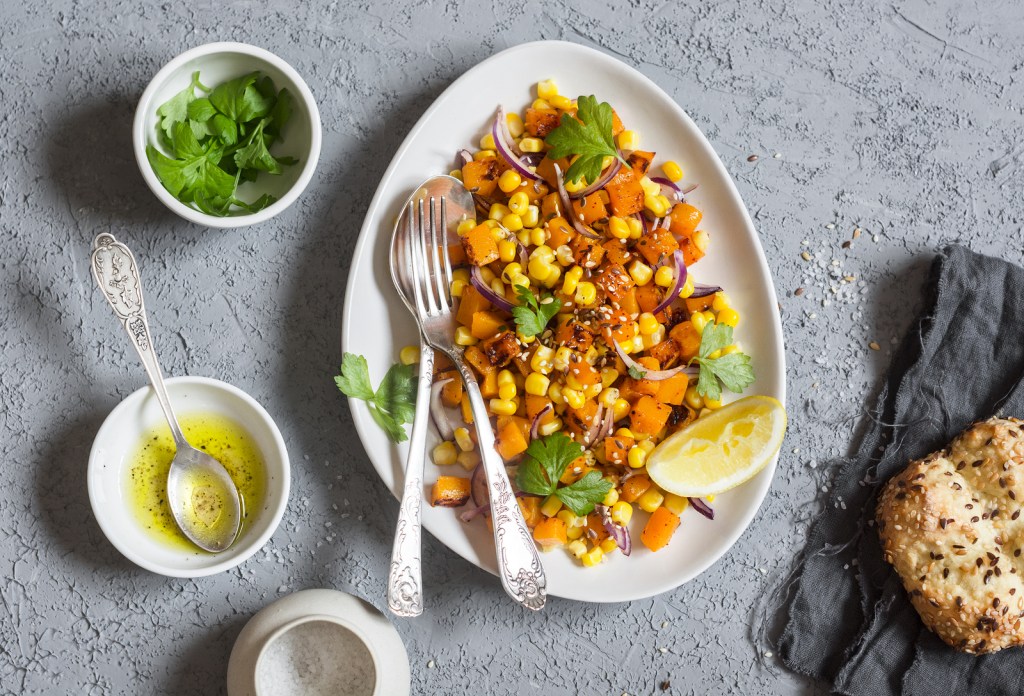
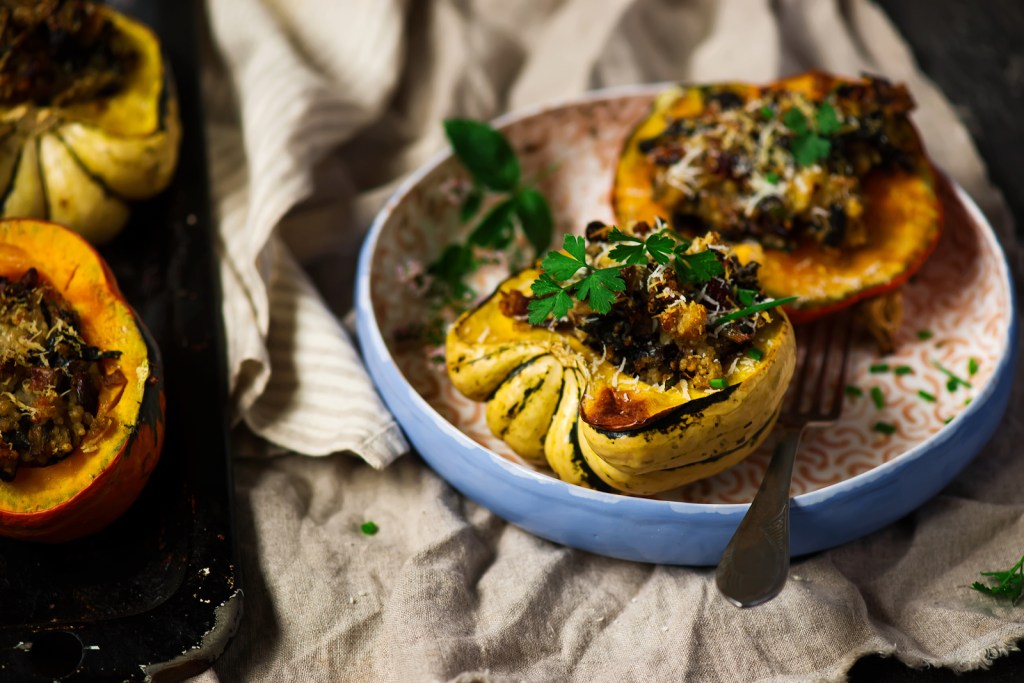
Tired of Playing Fowl on Thanksgiving?
You will absolutely fall in love with this umami-stuffed butternut squash so much that it just might persuade you to reconsider poultry this holiday season! Not only is it vegetarian, but it’s fancy! You’ll Need: 1 cup fresh pecans, chopped 1- foot long butternut squash 1 Japanese eggplant about 8-10…
-

30-Minute Chocolate Almond Toffee
For quick and delicious Chocolate Almond Toffee, use high-quality chopped chocolate instead of chocolate chips. This ensures better adherence to the toffee. Adding corn syrup helps prevent hard crystals, especially for beginners. Keep a wet pastry brush handy to wipe down any sugar crystals that form! You will be a…
-

The Brussel Sprout Files!
Below is a formula sure to make your Brussels sprouts a success, no matter what flavor profile you’re after—sweet, salty, or tangy! Brussels sprouts are aggressive in flavor. You either love them or hate them. There are many ways to cook them, too—from baked chips to chopped salads. At home,…
-
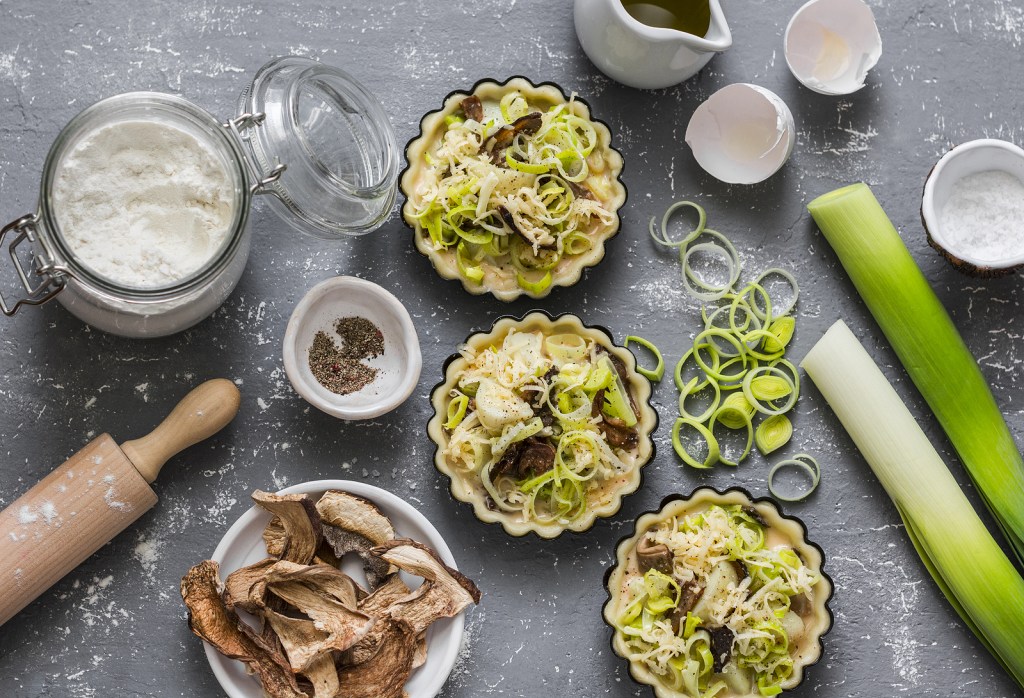
Wild Mushroom & Onion Tartlets
Now is the time of year when I start craving warm, belly-filling, heartier meals to warm me up. This delicious tart has classic vinegar-roasted onions, garlic-buttered mushrooms, and salty feta cheese! Perfect for making it a great casual gathering with a bottle of your favorite cool crisp Sauvignon Blancs or…
-

Decadent Creamed Corn Casserole!
Trust me when I say– someone at your dinner table will ask you for this recipe! You’ll Need: 8-10 ears of fresh shucked corn off the cob, or 1 pound frozen white kernels and 1 pound frozen yellow kernels. Or, all yellow. 1/2 onion, peeled halved and studded with 3-4…
-
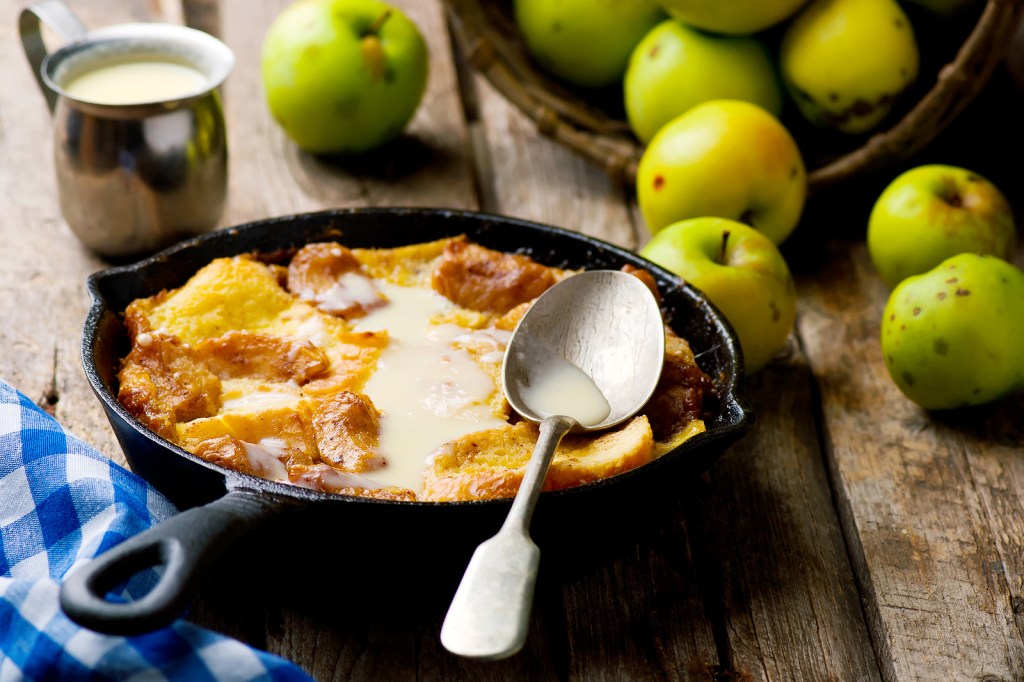
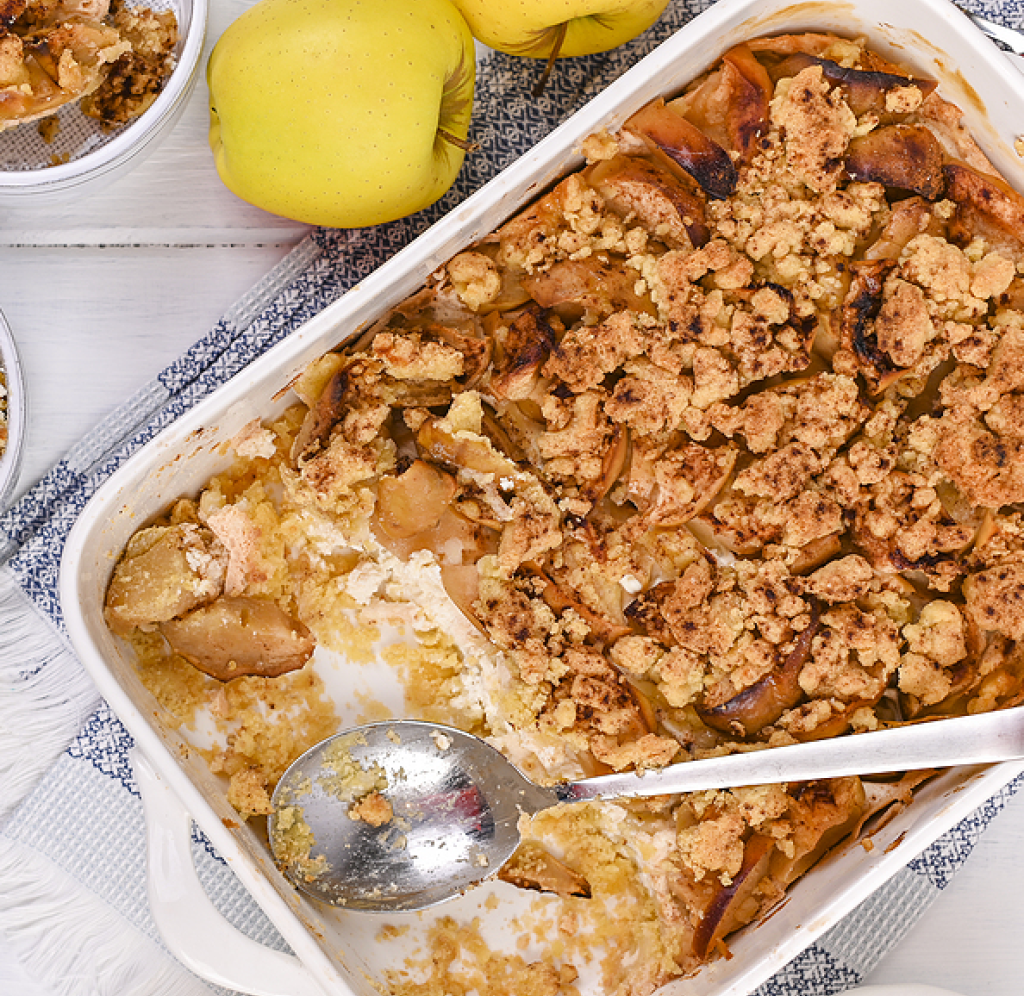
Warm Salted Caramel Apple Strada with Vanilla Sauce
A warm, simple, yet indulgent cold-weather holiday breakfast or dessert that’s perfectly gooey. Tangy winter apples, topped with vanilla sauce and in just enough salted caramel to make it even more special! For The Strada Mixture 6 tablespoons unsalted butter 5 medium tart baking apples, such as Granny smiths, peeled,…
-

Ultimate Cheese Fondue Recipe in Winter Squash
Drool! Fragrant melted cheese served in a communal pot, or a traditional caquelon or fondue pot over a little réchaud brought to temperature with a candle or various other types of flambe material. Small-bit-sized foods are consumed by dipping bread, assorted vegetables, and proteins dunked right into the warm, mouth-watering…
-
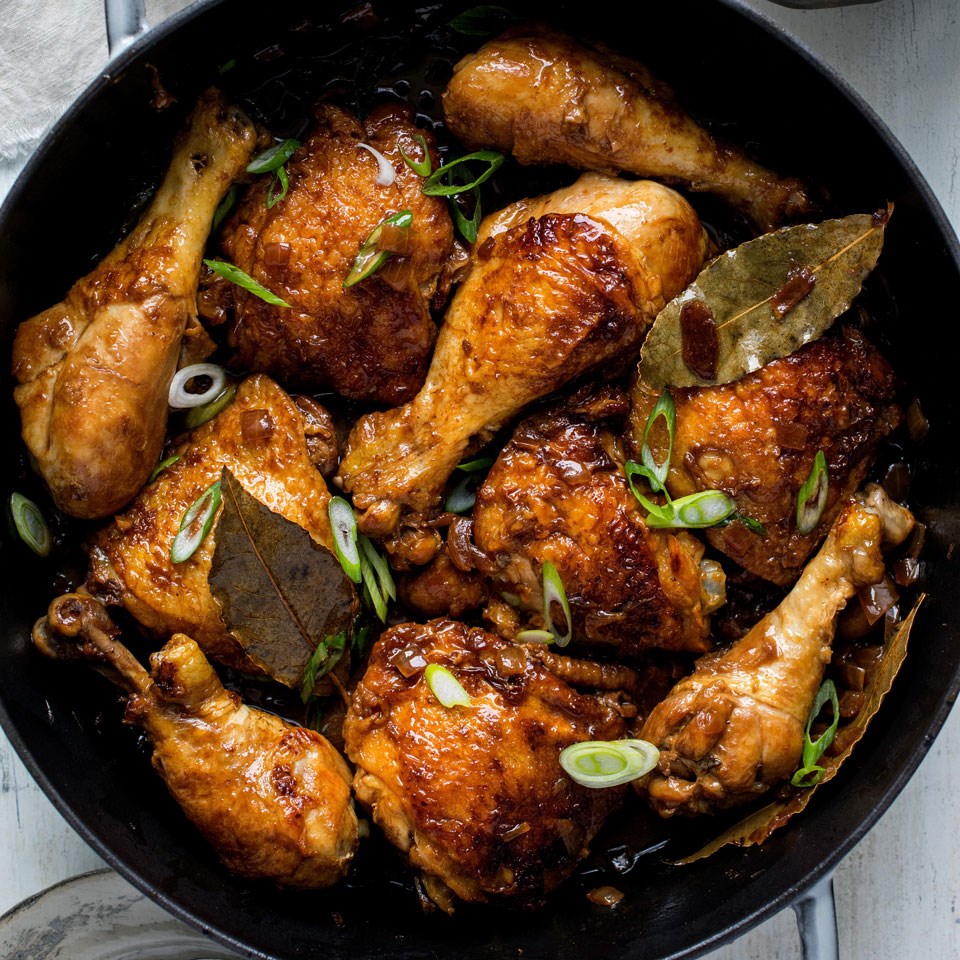
Instant Pot Chicken Adobo
Get all the flavor without all the time! If you’ve never tried Chicken Adobo, you’re seriously missing out! Adobo, sometimes referred to as the unofficial dish of the Philippines, contains bold, complex flavors that are deeply savory, slightly sweet with a hint of spice, and a perfect balance of Umami…
-

Sous Vide Fried Chicken and Waffles!
The consistency of using a Sous Vide machine will result in perfectly fried chicken every time! We all want that bite. You know the one—that succulent, juicy, tender center with that traditional crunch—golden crispy and perfectly brown every time! Sometimes, it’s hard for home cooks to achieve the same results,…
-

Boo-Berry Turnover
These easy blueberry turnovers are made with light, flaky puff pastry dough purchased at the store from the freezer section and a delicious homemade filling. These pastries make a super yummy treat that combines the sweetness of blueberries with the flakiness of puff pastry! Perfect for any occasion, especially Halloween! …
-

Kid Friendly Plant-Based Mac and Cheese!
My readers know how much I prefer to cook outside-the-box and supply modifications to my recipes. Parents need to pivot at any moment, and that means anything in the pantry could be on the menu. This high protein plant-based version of my Mac and Cheese recipe is also vegan. Whether…
-
Roasted Pumpkin Salsa
Looking for something different this Holiday Season? Try my recipe for roasted sugar pumpkin salsa! Pumpkin is not only the leading food this time of year, but it also has definite health benefits. If you want food to fill you up but not fill you out, the pumpkin will be…
-

Japanese Grilled Tacos with Momiki Black Garlic and Spicy Yuzu Scallion Salsa
Crafted in Miyazaki, Japan, Momiki Inc is famous for their black garlic and has a new line of healthy sauces containing Japanese staple condiments. Soy sauce, mirin, and sake with hand-crafted kombu-shiitake mushroom broth. The mature taste, of black garlic and the citris addition makes it incredibly versatile for all…
-

Crispy Pan Fried Snapper with Strawberry Tomato Salsa
Chef Gigi’s Pan Fried Fish with Strawberry, Tomatos Salsa
-
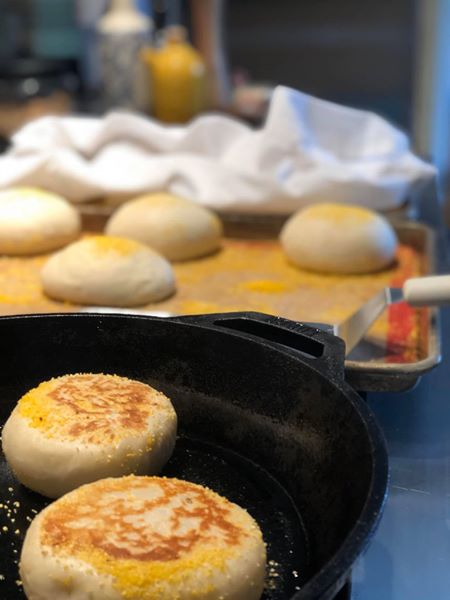
Homemade English Muffins
This recipe is so user friendly and satisfying. I like to use buttermilk for a pleasant, sour tang. The use of bread flour is for an incredible chewy bite. The dough will naturally be sticky, In essence, this is a good sign; the mixture contains optimal hydration, which will yield…
-

Turkey Pho Gà! A play on a classic. Vietnamese Chicken Noodle Soup.
The morning after. Feeling abundant due to the over indulgence of the holiday and looking for something different to do with your leftover Turkey? Make something light and delicious– a spin on the classic Vietnamese chicken noodle soup! The trick to delicious Pho gà is to add a little of…
-

Charred Black Garlic Chicken Skewers with Grilled Flatbread and Tzatziki
Black Garlic is hitting the food scene in America hard, and it’s about time. If you have not tried it, you are certainly missing out. You will love the mellow, robust garlic flavor containing the benefits of umami. You’ll pick up some fruity notes like ripe dates, and a finish…
-
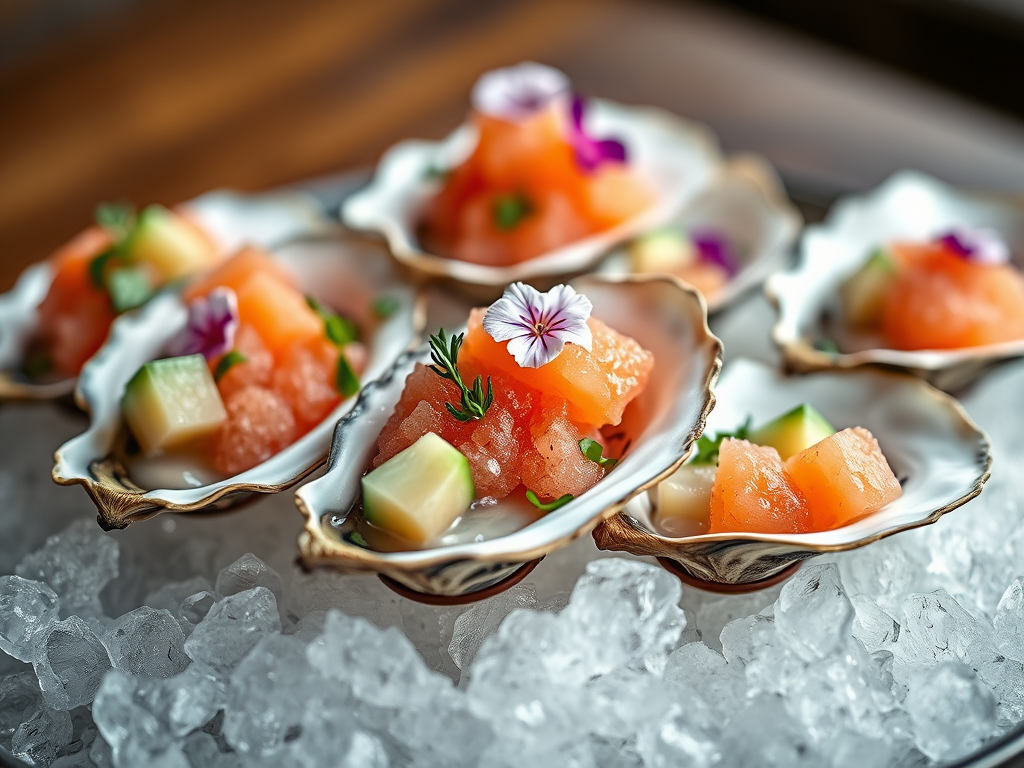
Kumamoto Oysters with Watermelon Granita, Cucumber and Serrano Chili
Fresh Kumamoto Oysters with, Watermelon Granita, Cucumber and Serrano Chili Paper
-

Traditional Vanilla Bean Pot De Crème
It doesn’t come more traditional than this! It’s time-consuming, but if you have the time to spare, you will learn why this recipe is a classic! It’s deliciously rich, creamy, and elegant. You’ll Need 1 1/2 cups whole milk 1/2 cup heavy cream 6 large egg yolks 1/2 cup…
-

Roasted Butternut Squash with Candycap Mushroom
The haunting maple flavor of Candy Cap Mushrooms transforms this dish into a versatile masterpiece. Although, this sweet winter squash can be a unique side dish that will impress your guests—with, or without the mushrooms! You’ll Need: 2 butternut squash, peeled and cut in half 1/2 cup dried candy cap…
-

Summertime’s Three Ingredient Fruit Leather
Fruit leather is one of my favorite snacks. Making it is gratifying, and you’ll know what your family’s eating-only three wholesome ingredients! You’ll Need: 3 cups fresh organic fruit, your choice 2-3 tablespoons local wild honey; you can substitute sugar or sugar-substitute 2 tablespoons of organic lemon juice Here’s How: …
-

Late Harvest Baked Apricot Galette with Fragrant Almond Pate!
Im in love with this years late harvest apricots, so I made this killer dessert recipe, check it out.
-

How To Make a Top Shelve Toastie
Experience a next -level grilled cheese sammy by elevating yours with triple creams cheese combos and delicious food parings. Grilled cheese sandwiches are a timeless comfort food favorite that never fails to satisfy our cravings for something warm, gooey, and delicious. While the classic American cheese variety has long been…
-

Effortless Entertaining! My Top 5 Frozen Burger Patties Can Save Your Summer BBQs, Just by Stocking Your Freezer !
Now is a good time to stock your freezer with premade burger pucks. They’ll come in handy on those days when you just need a quick grill option and don’t feel like making them from scratch or dont have the time. Frozen burger pucks can go straight from freezer to…
-

Mr. Frank’s Crunchy Fish Tacos Smothered in Serrano Avo 🥑 Sauce Topped with Tangy, Creamy Slaw!
The ultimo summer recipe! This recipe screams weekend! Although most fish taco enthusiasts always disagree about what makes the ultimate fish taco- know this- in its simplest form, this iconic dish consists of only a few items! Savory pieces of fish, a little dressed cabbage slaw and a cha cha…
-

Charred Beef Tip with Chinese Five Spice and Grilled Cara Cara Oranges
Chinese five-spice is pungent and encompasses all five tastes—sweet, sour, bitter, salty, and umami—and uses five different spices. This dynamic Asian seasoning is a mixture of star anise, cloves, Chinese cinnamon, Szechuan peppercorns, and fennel seeds. It’s easy to make at home, but it’s ok to purchase it premade too.…
-

Useless Kitchen Gadgets
When it comes to kitchen gadgets, one of my biggest frustrations is the sheer number of unnecessary tools that retailers offer. Personally, I always reach for my chef’s knife because it can handle so many tasks so well. Here’s the truth: it’s best to invest in gadgets that serve a…
-
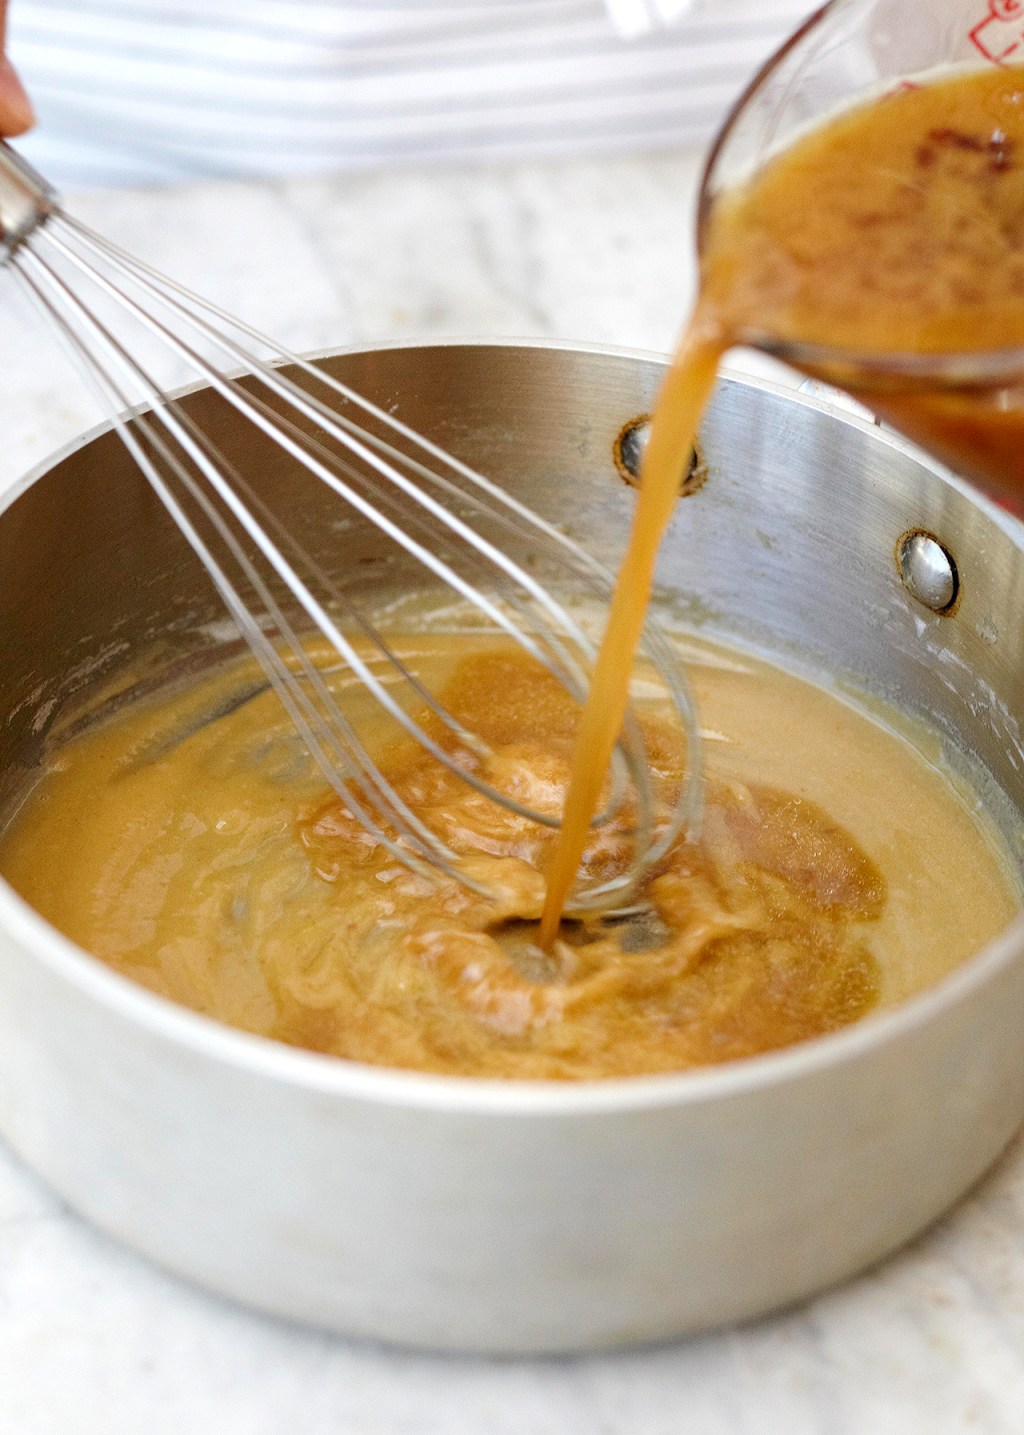
Make Ahead Thanksgiving Gravy
So… what came first, Turkey or the Gravy? Everyone says you need turkey before the gravy, but that’s not so, and really, who cares. The point is you need the gravy first to make your life easier. Why? Because Thanksgiving can be an ordeal if you are short on the clock,…
-

Creamy Tuscan Salmon
Picture this pan-seared salmon drowning in a creamy Parmesan sauce with garlic, olives, tomatoes, spinach, and fresh basil. This sexy recipe is the perfect date night dinner – and it’s ready in 30 minutes! What’s not to love? Present to the table in its cooking vessel. Ladle into bowls and…
-
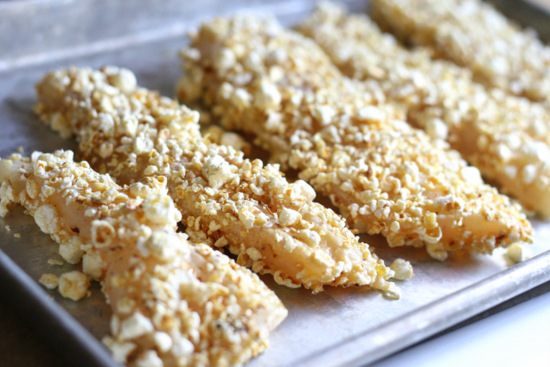
Popcorn Crusted Fresh Fish Filets
Hey guys heres my weekday recipe for Fast, cheap and easy! #fishsticks
-

Oven-Fried Crispy, Garlic & Herb Smashed Potatoes
The cooking techniques in this recipe are responsible for the deep flavor layers you will taste on the interior of these potatoes. So much so I’m willing to bet these will quickly become a family favorite. Oh, and did I mention the additional crunchy oven-baked texture? Whoa! Pair with a…
-
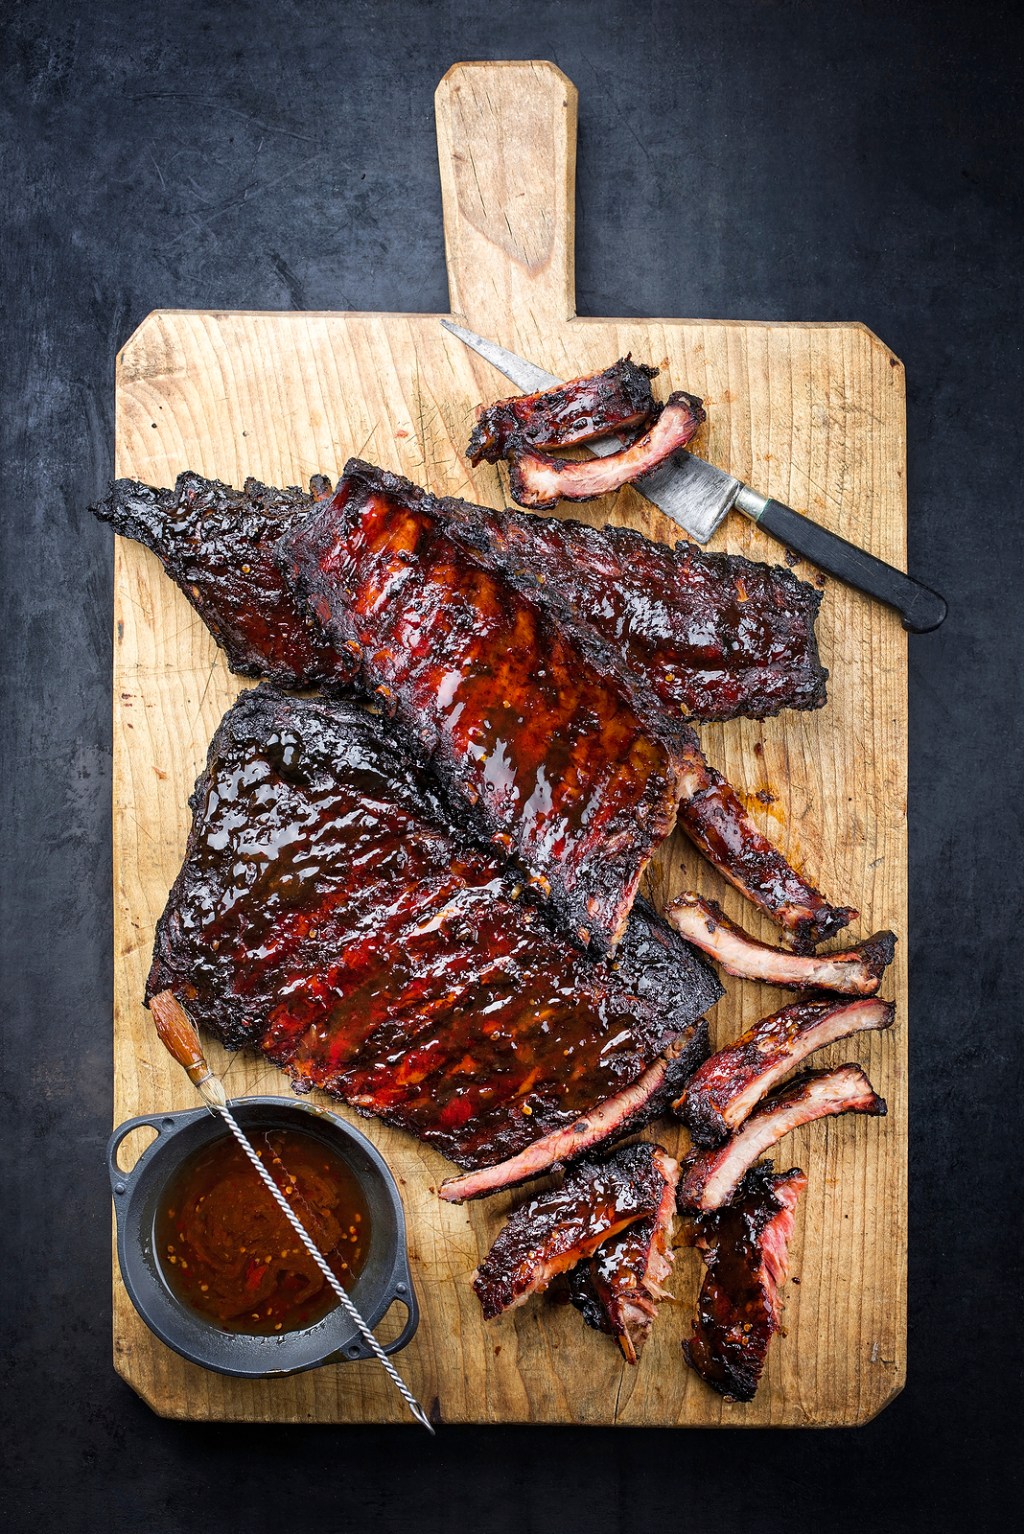
Korean BBQ Pork Ribs, Mapo Style with Grilled Asian Pears
Mapo-gu in Seoul, Korea, is known for its hip vibe with quirky boutiques and late-night restaurants serving Korean BBQ with beer. Relaxed rooftop bars overlook Hongik Park’s hangout, while jazz bars and live music venues in the area have an offbeat feel. Mapo is also a popular spicey Chinese dish…
-

Death By Chocolate
I’ve been developing this dense brownie recipe for a while. One day, my eldest daughter searched through the hand-scribbled recipes I keep in the top utility drawer in the kitchen. I’ve only half-written recipes and formulas. Some contain ingredients without a method, and some include methods without ingredients. Cleary, lazy…
-
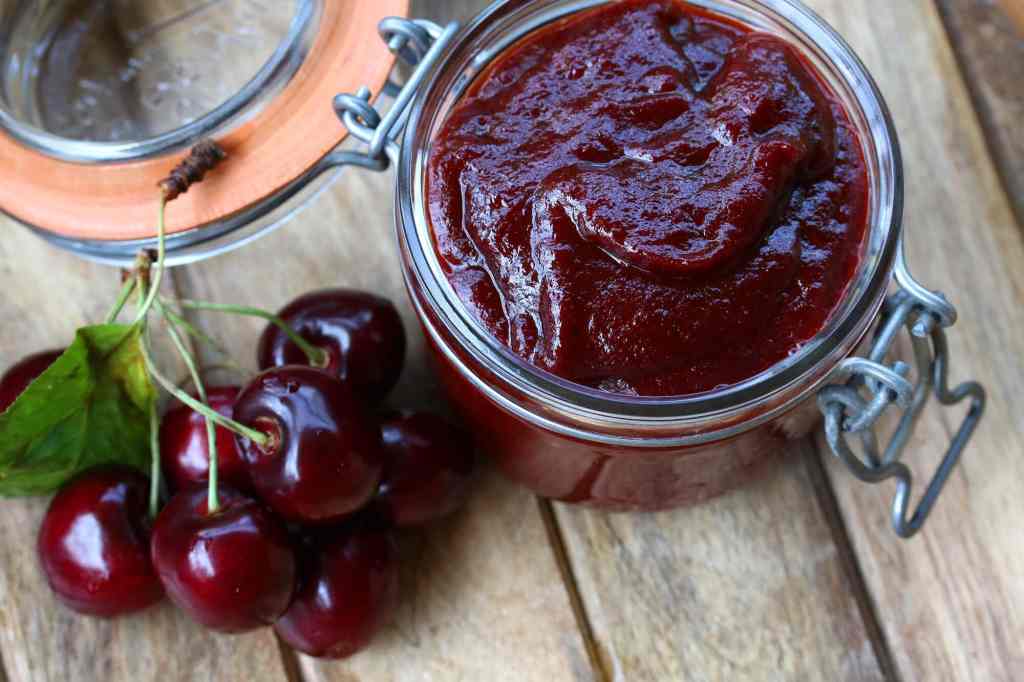
Smoky Duck Tacos with Bing Cherry Sauce
Rev up your next taco night with a little something different! You’ll Need 1 pound duck breast 2 teaspoons chipotle chili, ground 1 teaspoon cumin, toasted and ground 1/4 teaspoon salt to taste 2 cups Bing cherry sauce ( recipe below) 12 street taco sized corn tortillas, lightly grilled Red…
-
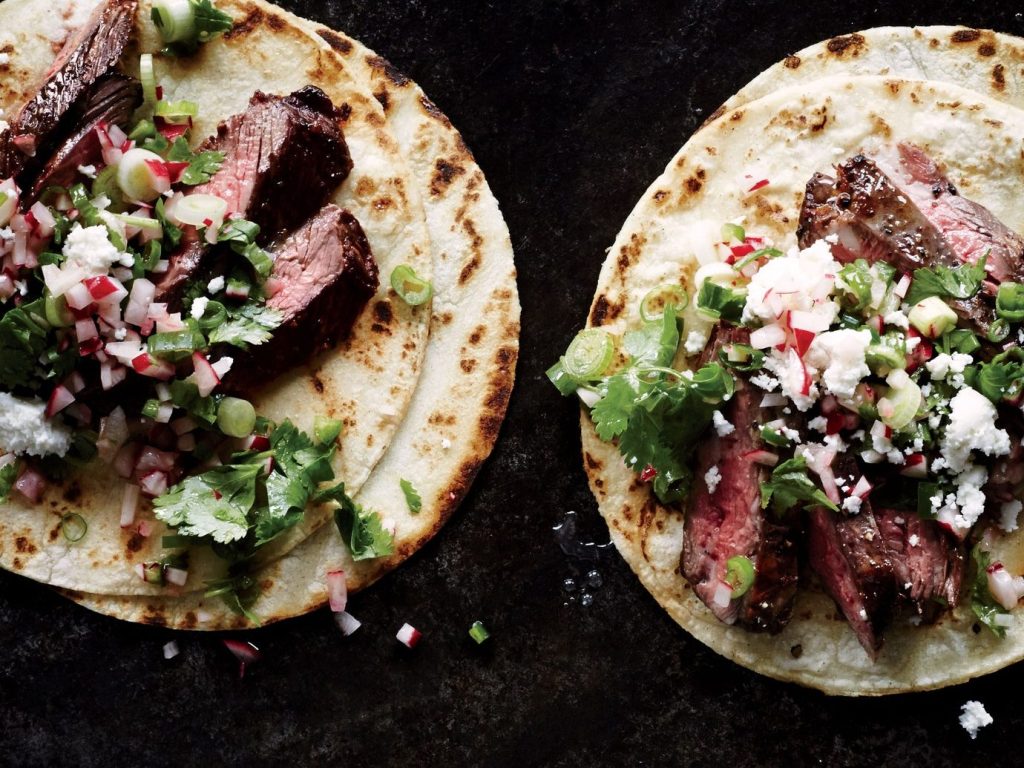
Grilled Steak Tacos with Serrano-Blueberry Salsa
Celebrating? Check out my Recipe for Fancy Grilled Steak Tacos with a Serrano-Blueberry Salsa! Taco Tuesday is up
-

Fresh Summer Tomato Tartlet on Puff Pastry
Chef Gigi’s Sliced Puff Pastry, Herbed Riccota and Sliced Fresh Tomato Tart
-
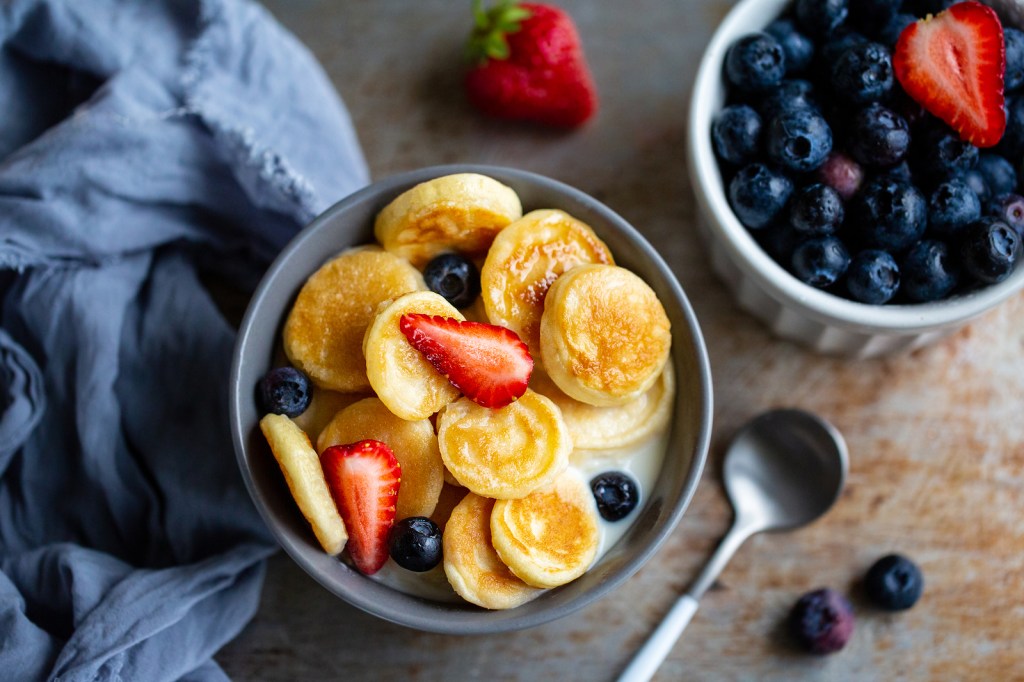
Mini Pancake Bowl with Maple Syrup Flakes and Fresh Berries
Who doesn’t just love a pancake… especially a mini-pancake bowl… not to mention, I’ve added a variation ingredient if you incline; chocolate! Mini pancakes are the best for adults as well as kids! Make these cuties and eat some now, save some for later! Freeze individually on a baking sheet,…
-

Homemade Churros with Chocolate Sauce!
All you need is a few simple ingredients and less than 30 minutes for hot, crispy Homemade Churros with Chocolate Sauce! Churros are traditional Spanish desserts. They are popular in Spain, France, the Philippines, Portugal, South America, and the Southwestern US States. Now we know why! For the Churro Batter…
-

Chef Gigi’s Holiday Cutout Cookie Dough
Be sure to read my pro-tips at the end of this recipe to ensure a successful baking experience! You’ll Need: 6 cups, all-purpose flour 3 teaspoons fresh baking powder 1/2 teaspoon salt 1 pound cold unsalted butter, cut into 1-2 inch chunks 2 cups white granulated sugar 2 large eggs…
-
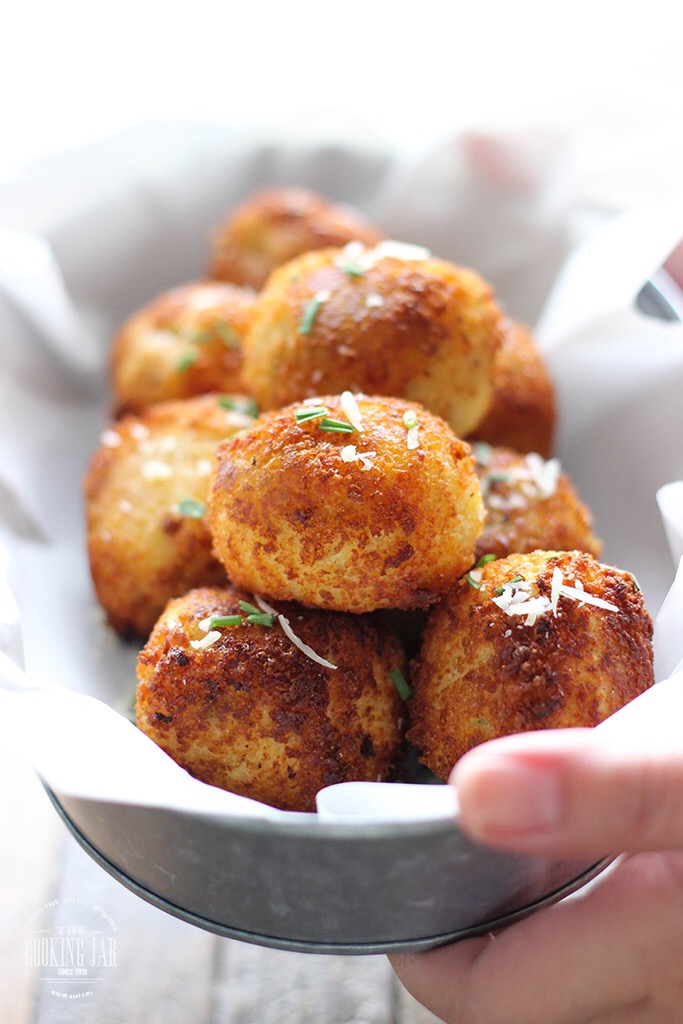
Leftovers? Make Mash Potato Bombs!
Baked or fried these are a fun way to use up any left-over mash potatoes… or, a good excuse to make more! You’ll Need: Filling: 3 cups chilled mashed potatoes 1 cup cheddar cheese, shredded ½ cup bacon, chopped small dice 1 bunch chives, chopped Pepper to taste Breading Station:…
-
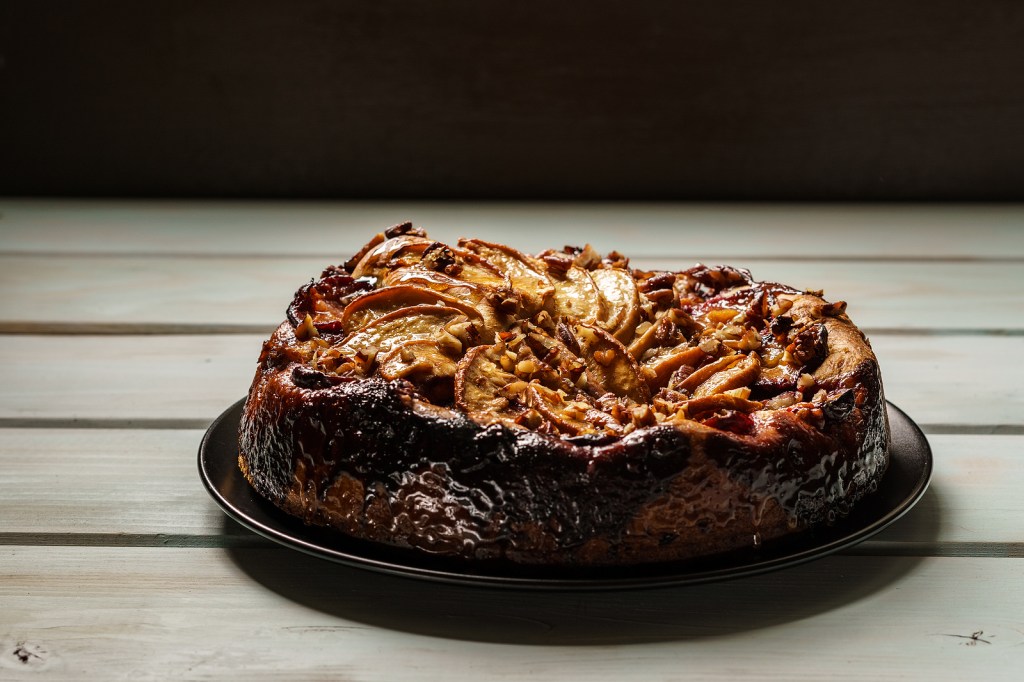
Cardamon, Honey Cake with Fresh Baked Pears
Perfect for Fall, this recipe calls for Bosc pears, try not to substitute- this varietal has firmer flesh than others, which helps hold its shape during baking. You will swoon over the combination of sweet, sticky cardamon spiked honey liberally soaked into this lovely cake. You’ll need For the cake:…
-

Candy Cap Roasted Butternut Mash
The haunting maple flavor of Candy Cap Mushrooms makes this so much more than a great side dish. This wintry squash can also become the base of a magnificent butternut squash soup if you have leftovers. You’ll Need: 2 pounds butternut squash, peeled and cut into medium-sized dice 1 cup…
-

Make Ahead- Chocolate Espresso Pot De Crème!
Perfect sweet little finish to a large festive feast, just in time for the holiday! And make ahead the day before so you don’t need to worry about making dessert the day of your event. Also, great little treat just to have hanging around the fridge. If you can save…
-

Not-So-Traditional Bulgarian Banitsia
Banitsa is a famous cheese, yogurt, and egg pie. Historically renowned dish of Balkan cuisine and typically served for special events. I can’t get enough of it. Based on my geographical location and ingredients, this recipe still has enormous flavor; the sharp feta cheese with the richness of the eggs…
-

Refreshing Lavender Lemonade with Butterfly Pea Flower
While all types of lavender are edible yet English and Provence varieties are widely for cuisine. If you use fresh garden buds, make sure they are free from pesticides. I’ve added organic dried butterfly pea flowers for the subtle violet color. The flower buds are steeped with sugar and hot water to make…
-

Watermelon and Bergamot Orange Coolers
We can trace bergamot’s origins back to Southeast Asia. Currently, thsi sour citrus is grown in many parts of the world, today its prominence comes from the town of Bergamo in southern Italy. This citrus has a soothing scent, spicy taste, and broad range of uses. Research on bergamot oil…
-
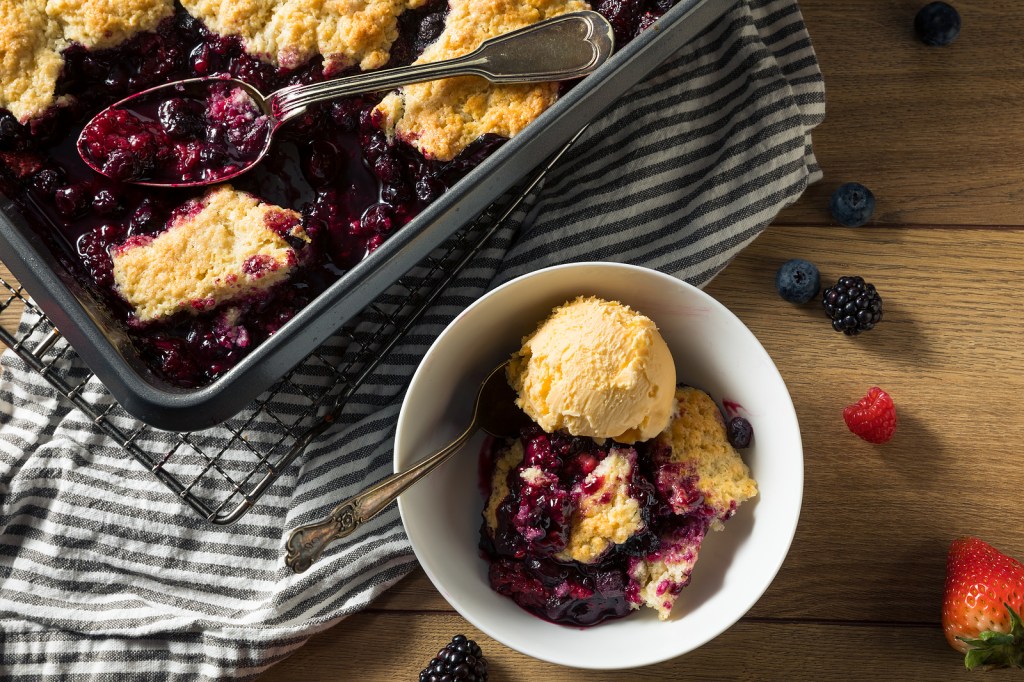
The Difference Between Buckles, Cobblers, Crisps, Grunts, and Slumps, and More!
Finally, summer fruits are here! The beginning of the warm weather season, signaling a good time to inventory and restock your pantry with fresh spices and your favorite extracts to complement fresh fruit at peak flavor. After locked down for the past year, we all need a little bit of…
-

Homemade Chocolate Cake with Candy Cap Mushroom Frosting
Candy Cap mushroom, also known as Curry Milk Cap mushroom, is a peculiar mushroom variant often used as a natural sweetener and flavor enhancer in various desserts. Yes, you’ve read that right, desserts. Highly obvious by their scent, which has been compared to maple syrup or butterscotch. It’s signature sweet…
-

Sweet Bunny Bread
Billowy soft, enriched with both eggs and butter, slightly sweet. Great for breakfast with butter and jam or a welcomed Sunday Brunch. I can eat this all to myself. Sigh! I’m looking forward to springtime and chocolate bunnies, so why not shape our bread into something to remind us sunny…
-
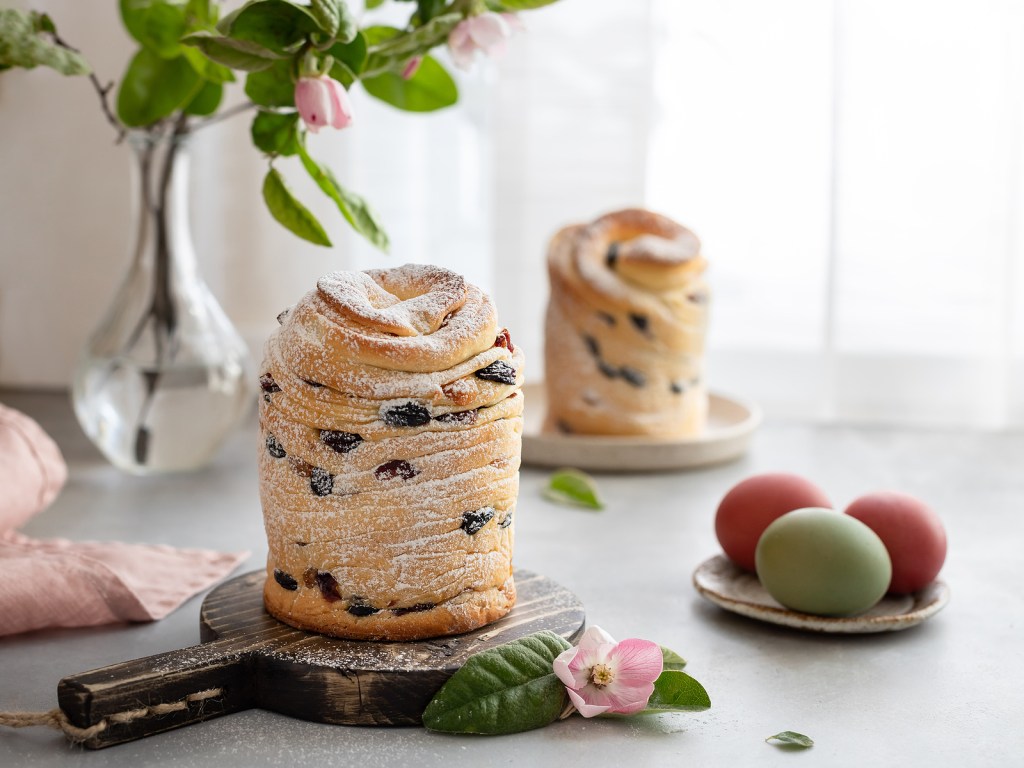
Spring Cruffin
Locked up in 2020 for so long and the anticipation of warmer weather, I’m beginning to feel like a Sping Cruffin! Uhhh, Yes, I just wrote that. That’s how long Ive been in the house. Covid go away already! Like the Cronut, a modern-day mash-up of croissant-doughnut pastry invented by…
-

DYI Marshmallow Peeps!
You know Spring has sprung when Marshmallow Peeps are on the shelves in every drug store imaginable! This season, make your own and avoid almost all the crazy ingredients found in the large manufactured varieties. Plus… soooo much fun to make! You’ll Need For the Colored Sugar 3 cups granulated…
-

10 Tips to Make the Holidays Happy for Everyone!
For us… the ” Grown-ups”- the holidays are a festive time. We travel to the homes of family and friends, or invite them into ours. We show off our children and indulge in recipes from our own childhoods. While we like to think the kids are enjoying themselves, that’s often not…
-

Chocolate Stout Cupcakes with Brown Butter Frosting
Go Ahead…get Boozy with it! You’ll Need: For the Cupcakes: 2 3/4 cups all-purpose flour 2 teaspoon ground cinnamon 1 1/2 teaspoon ground ginger 1/4 teaspoon ground nutmeg 1/4 teaspoon cloves 1 1/2 teaspoon baking soda 1/2 cup butter, melted 1/2 cup granulated sugar 1/4 cup dark brown sugar, packed…
-
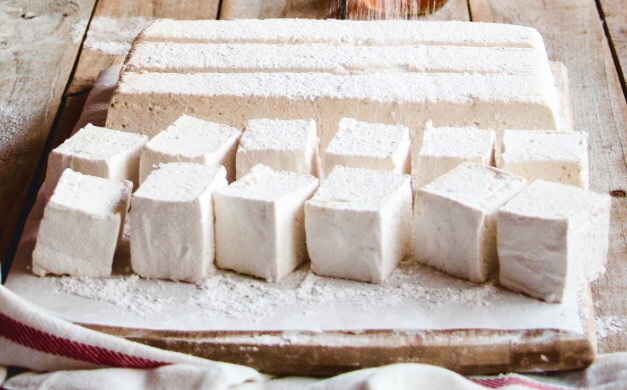
Homemade Holiday Marshmallows!
Try this homemade marshmallow recipe as a base formula. You can make additions of essential oils or flavored extracts along with organic food colors to create a variety of fun flavors. So easy, you won’t believe it. You will never want eat a store bought marshmallow again! You’ll Need: 3…
-

Hot Chocolate French Toast with Roasted Hazelnuts
Who doesn’t want to wakeup holiday morning to the smell and taste of hot chocolate and roasting hazelnuts? You’ll Need: 1 loaf Brioche or and Egg enriched bread, cut into 1 inch thick slices Unsalted butter 3 cups heavy cream 6 ounces milk chocolate, coarsely chopped 6 ounces semisweet chocolate,…
-

Homemade Naan
Serve plain or brushed with melted butter and sprinkled with herbs! Delicious with my Fried Egg and Chili Jam Naan Recipe! 2 tsp dry active yeast 1 tsp sugar or honey 1/2 cup water 2 1/2-3 cups flour, divided 1/2 tsp salt 1/4 cup olive oil 1/3 cup plain yogurt …
-

Fried Egg Naan with Sambal- Oelek Jam
Heat your Cold Winter Mornings! You’ll Need: For the Chili Jam: 2-4 tablespoons hot chili paste (sambal oelek) 1-2 tablespoon unseasoned rice vinegar 1-2 teaspoon honey For the Egg Naan: 1/4-1/2 cup Plain Greek yogurt Kosher salt & fresh ground pepper 2-4 tablespoons extra-virgin olive oil 1-2 tablespoons butter 2-4…
-

30 Minute Individual Chocolate Lava Cakes
Molten chocolate lava cakes were developed by one of the worlds most famous chefs- Jean-Georges Vongerichten! He says more than a thousand of these cakes are made in his restaurants everyday. The ingredient list is simple –butter, chocolate, eggs, sugar and flour which makes this recipe easy for busy people!…
-

The Ultimate Thanksgiving #Leftovers! Hot, Open-Faced Turkey and Gravy Sammies!
Nothing like a Good ol’ Fashion Open Turkey and Gravy Sandwich the Day after Thanksgiving! You’ll Need: 1 1/2 lb leftover turkey meat, sliced 1/2- 1 cup leftover turkey gravy Stock or water (to thin the gravy if needed) 4 large slices of rustic Italian bread Butter Crushed fresh garlic…
-

Southwestern, Turkey Tamale Pie!
Got leftovers? Dont worry- they will disappear in a second with this recipe! Tamale pie is a casserole dish found in the cuisine of the Southwestern portion of the US. Typically prepared with a cornmeal crust and ingredients used in delicious recipes indigenous to the region. A typical comfort food…
-

Stuffed Mushrooms with Italian Sausage, Sherry and Parmesan Cheese
First, a little “Housekeeping” regarding mushrooms: How to purchase a brown ( Cremini ) or white (Champion or Button) shaped mushroom. If you know me, you know I love to forge in the wild for mushrooms. Shopping for mushrooms in a large chain grocery store can be like hunting. By…
-
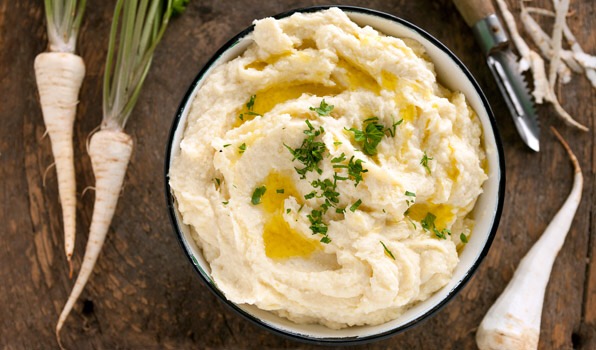
Luscious Parsnip Purée with Truffle Oil !
Originally posted on Chef Gigi Gaggero: Parsnips are my all time favorite root vegetable to purée or mash ! They are so naturally sweet and not too starchy, which makes for an ultra-silky side dish!? Ingredients: 1 pound parsnips, peeled, thinly sliced- tough cores should be removed on larger parsnips…
-

Butternut Squash and Candy Cap Mushroom Brûlée
Incorporating these two seasonal ingredients into a crème brûlée makes perfect food pairing sense! Not to mention a sophisticated Thanksgiving dessert. Extracting the famous candy caps’ flavor is done by infusing the maple flavored mushrooms in cream. The same recipe method can also be used to flavor seasonal ice creams…
-

The Best Thanksgiving Stuffing I’ve Ever Made!
Grand Mariner Apricot and Sausage Stuffing. This recipe is adapted from The Silver Palate Cookbook. One of the first cookbooks I ever purchased. Co-Authors, Sheila Lukins and Julee Rosso Miller were hot on the gourmet carry-out scene in 1980’s. They really kicked off the “Artisan” food trend! From that birthed,…
-

Beautifully Creamy, Delicious… Ugly Soup.
Celeriac, also called turnip-rooted celery, or knob celery, or celery root– is cultivated for its delicious, edible roots, hypocotyl, and shoots. While this delicious root vegetable has many cooks and urban gardeners disagreeing on what to call it– there is one thing everyone agrees on. Many say, celeriac is the…
-
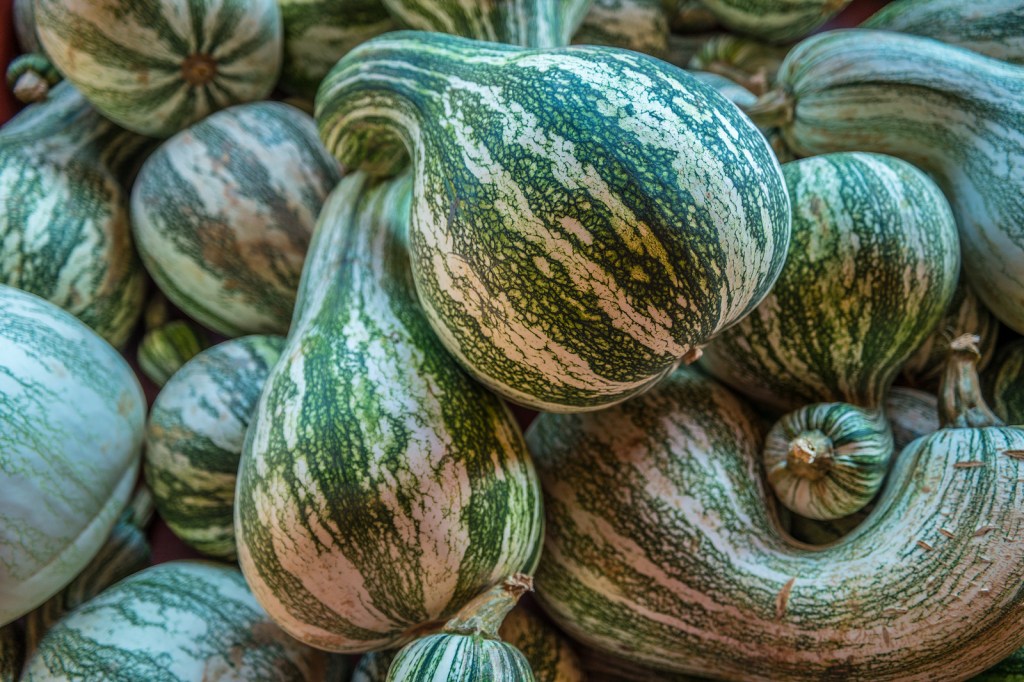
Meet The Cushaw Squash
Early fall is one of my favorite times of the year, the weather is perfect, the leaves are changing, and squash is bountiful! The beautiful and alluring, Cushaw Squash is a huge valued crop, because it is inexpensive and stores for about four months. They average about 10-20 pounds, grow…
-

Chef Gigi’s Kabocha Spiced Rum Cake !
Looking for that perfect dessert this Winter? Kobocha is the Japanese word for squash. This squash has a nutty, earthy flavor with a touch of sweetness. So delicious and versatile ! Kobocha squash can be used in sweet and savory applications. This Spiced Rum Cake will be the perfect addition…
-
Drunken Squash with Forbidden Black Rice and Dried Fruit!
Once Reserved Only for the Noble. The health benefits of black rice are so powerful, this ingredient earned its name. Highly prized by noblemen and once forbidden amongst the common in ancient China. Black rice, was first introduced to the United States just recently, in 1995. Today it’s gaining popularity.…
-
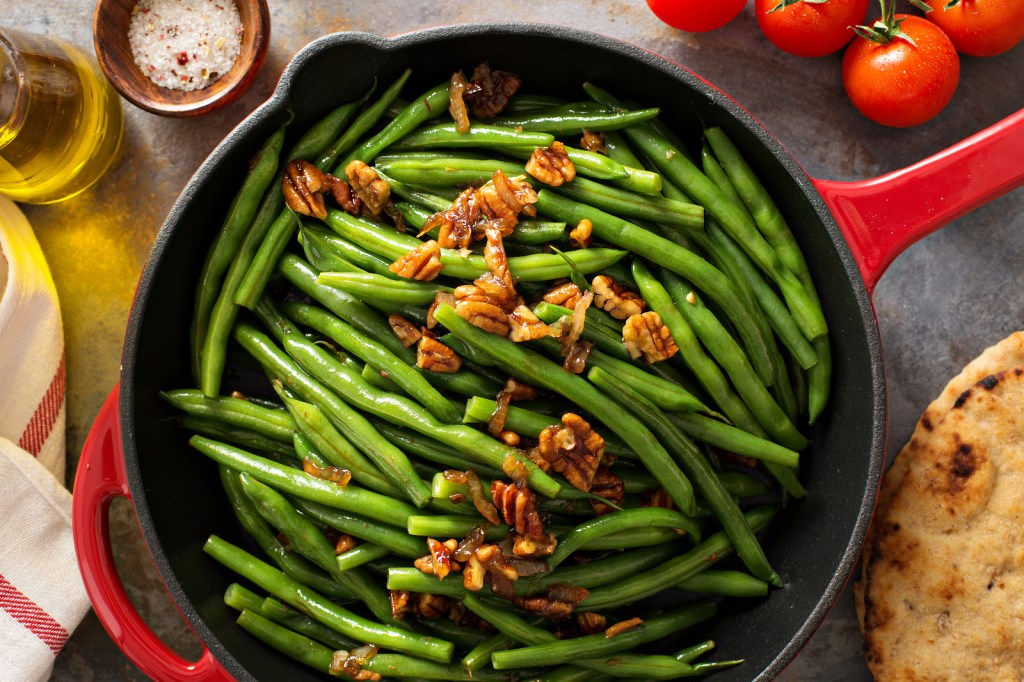
Green Beans with Brown Buttered Walnuts and Caramelized Shallots
I love to cook green beans, especially Haricots Verts, pronounced { herəkō ˈver } they are delicious and so tender. They are the French variety typically slimmer and longer than the common green bean we see here in America. You can use any fresh green bean for this recipe. You’ll…
-

Meet The Delicata Squash
Delicata is commonly considered a winter squash, it is scientifically classified as a summer squash due to its thin and edible skin. Also, to be more confusing, it’s a fruit, commonly considered a vegetable due to its savory flavor. The oblong-shaped Delicata – pronounced dehl-ih-CAH-tah- is a fall delicacy but…
-

How to Make Your Halloween Sugar-Free in Five Minutes or Less!
Halloween is just around the corner and you might be cringing at the thought of your child coming home with that giant bag full of candy. Honestly, who says treats have to be candy? Make life easier for you and healthier for the kids in your neighborhood. Purchase party favors…
-

Fire Up the Grill! Make this Smokey Grilled Potato Salad with a Lemon Vinaigrette!
This Grilled Potato Salad is a tangy twist on the classic! Perfect for your July 4th Celebration! You’ll Need 2 pounds medium-sized Yukon potatoes 1/4 cup scallions, thinly sliced 2 tablespoons minced fresh oregano, divided 1/4 cup minced fresh parsley leaves, divided 4 cloves garlic, minced, divided 1 shallot, small…
-

Bento Nouvelle- The New American Lunch Box !
Let’s take this moment to reflect back when you were a kid. Try to entertain a specific positive childhood memory surrounding your formidable lunchbox! You, a young, carefree, confident feeling kid sporting this brand new, or handed down from the cool cousin-piece of gear for back-to-school. This box, and what…
-

60 Minute Apricot Galette with Homemade Almond Paste!
What is better than the luxurious combination of fragrant almond paste, juicy summer apricots, and a buttery flakey crust? Just might be that you can make this in under an hour! You’ll Need 1 cup almonds, blanched 1/3 cup granulated sugar, plus more for sprinkling 1 large egg 4 tablespoons…
-
Subscribe
Subscribed
Already have a WordPress.com account? Log in now.
