
Sixteen years ago I designed a cooking school for kids with my then, 6 and 8-year-old daughters. They named it: Kids Culinary Adventures- where math, reading, science and art mix with kids. Although I’ve retired from teaching hands-on to children- and both my kids grew up and onto college. I do continue to food coach parents on picky eaters, on how to shop, and eat healthier.
Several classes at Kids Culinary Adventures were popular, many really stood out and we would need to continually teach them. The class I will be sharing with you today was always a success. It was called,”Have You Lost Your Noodle?”. KCA was popular for anchoring academic through the medium of cooking. This class was no expectation. Have you lost your noodle, was a vehicle to teach at home pasta making and an opportunity to discuss the beautiful history and geography of the noodle. As you might imagine it was a wonderful social studies course as a whole.
As the founder of KCA, my family and I have designed well over 400 culinary classes throughout the years. All of those classes have been taught in our San Francisco, Bay Area location. Have you lost your Noodle, was no exception. The funny part was – THIS was the class all the parents wanted to take. The demand was so high– we eventually designed an adult class that would also guide families away from fast, additive free, highly processed and pre- prepared foods. We named this class:”Cook Outside the Box”. Parents were learning how to and cook fresh– and, in as little time as possible.
Making pasta from scratch only seems like a huge undertaking. I’m here to tell you–making fresh homemade pasta can be done in under 30 minutes of hands on attention! (with the exception of the dough’s rest period.) It’s likely you will be spending more time reading about pasta making— than you will be actually engaged hands-on.

Before you approach the recipe– here are a few things I’d like to chat about before sending you off with a basic pasta dough recipe— here they are:
About the Flour :
The names, Doppio Zero ( double zero), 00 and 0 flour refer to specifically Italian milled flours used for pasta making.
The Italian grading system is used in many pasta making recipes—and is as follows: 2, 1, 0 or 00. These symbols indicate to how finely the flour is ground, and how much of the bran and germ has been removed in the process. American flour, on the other hand is graded by both– color included: white, brown, whole meal and by gluten content, or strength. We read names such as: all purpose, strong, extra strong or similar grammar. The basic rule rule of thumb among cooks is the stronger the flour, the better the bread. The less dense the flour is, the better the cake or pasta. All else being equal, stronger flour is good for stronger bread type textured items. We avoid these characteristics in our cakes and pastas.
If you are looking to make a better pasta, start with a finer flour– all purpose will work too, but 00 flour has been refined more so than the standard all purpose flour or bread flour– which is higher in protein, and could result in your pasta tough to the bite and chewy.
The bottom line is : All this doesn’t refer to the flours ingredients, as much as it refers to how finely the flour has been ground down. Doppio- zero is great to work with — especially making pasta by hand. It is super-fine, like talcum-powder. Because it is so fine, the whole mixing, folding, rolling process is much easier, and result in a perfect textured product. Italian Grade 00 is a soft flour with around just 9% protein and best for cakes. I use it for pasta too.
Lower gluten = soft flour = cake, pasta, items soft and billowy baked goods
High gluten = hard flour = breads or yeasted items that expand with heat need to withstand the rise of the yeast without blowing the top off the loaves.
Variations: Some cooks like to add fresh chopped herbs. Fresh garlic, or powdered spices to the recipe before mixing and kneading — just make up for the variance of water content if there is one. Some people like to add liquified spinach, or other delicious vegetables. Experiment. The dough will tell you what it needs— by how sticky or dry it is. Listen to it. Start with a basic dough recipe below and gradually begin to add to your repertoire each time you make a new batch. Learn the basics first.
Making dough on a raining day is not for first time learners. The flour will absorb the moisture from the humid atmosphere and make things… well, a sticky situation. Making dough on these days become a bit more time-consuming, among other things. Stick to drier temperatures until you really have the pasta making method down.
Note of Filled Dough: Pasta can be filled with just about anything. The most important thing to remember is: How the dough is cooked and filled. Over-filled or under-fill can ruin your day. If you over-fill the dough, you risk the ravioli or the tortellini popping in the cooking liquid. If you under-fill the dough, you risk the mouth-feel at serving time will be just chewy gob of tasteless dough.
Chefs Secrets:
Adding any type of oil to the water is a no-no — this will stop the pasta from its absorption rate, and the sauce will run off of it instead of adhering the finished product.
Always add a touch of the pasta’s cooking liquid to the sauce. The starch in the water will combine with your other ingredients and become sticky insurance— the results will be a better marriage between your pasta and your sauce.
If making any type of creamy egg-based pan sauce; always add the sauce while the pasta pan is completely off the flame. This reduces your risk of scrambling the eggs in the recipe and instead will result in a beautiful decadent base to blanket your glorious work.
Always cook pasta in boiling salted water.
Basic Pasta Recipe
Ingredients:
3 large egg yolks, room temperature
1 Tablespoon good quality olive oil
Pinch of salt
2 cups of low protein flour, such as Italian grade Doppio-Zero flour or American grade AP or cake flour, sifted.
Method:
Whisk eggs and oil in a medium bowl or if you don’t want any clean up in a large plastic food storage bag– but begin on the table if you want the authentic feel. Combine with your finger, the salt and 2 cups flour in a large bowl. Make a well in the center of the flour, and pour the egg mixture into well.
Gradually incorporate flour mixture into egg mixture with a fork or your fingers– (shaped in a claw ) mix until a shaggy type dough forms.
Turn the dough out onto a lightly floured surface and knead until it comes together as a smooth ball. About 5-8 minutes. If the dough is sticky, dust lightly with additional flour as needed. The dough will become family stiff because the protein in the dough is developing gluten strands. These strands are like rubber bands. If the dough becomes too difficult to knead cover it and give it a five-minute rest. This will relax the gluten strands and allow you to get back to work.
Once a smooth ball has been formed from your kneading efforts, shape the ball into a 1/2 inch disk. Wrap in plastic or in a gallon sized food storage bag. Allow to rest until the dough holds an indentation when pressed with your finger, minimum 30 minutes but up to 1–2 hours is fine.
When you are ready to roll—literally
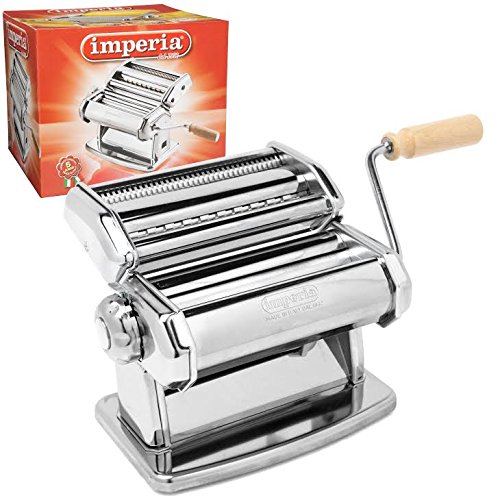
Set a pasta maker to thickest setting. (If you do not have a pasta maker, skip this step and proceed to my notes below). Dust dough lightly with flour and divide into 4 pieces. Working with a single piece at a time and keeping remaining dough wrapped in plastic.
Flatten dough into a narrow rectangle no wider than mouth of machine and pass through the rollers on the highest setting. Alternatively, flatten the dough with a rolling pin.
Fold the outer most edges in from each side overlapping one another, then rotate the whole piece 90 degrees. Run through the rollers again and then repeat without folding or rotating , adjusting the machine to a thinner setting after each pass. Dust lightly with flour if the dough becomes sticky at any point. Continue until the pasta sheet is 1/16” thick— and you can almost see your hand through it, like a fine set of silky sheers, as in,“window treatment”. Usually about an #8 on the dial of most pasta making machines.
Place your newly formed sheets of pasta sheets on a lightly floured surface to dry. Or hang on a clean clothing hanger, covered with a clean lint free dishcloth. The dough can be rolled out into sheets 4 hours ahead. Stack on a baking sheet between pieces of parchment paper; covered. Cut into any shape or form.
Rolling the Dough by Hand
If you don’t have a machine, don’t worry. Use a rolling pin and your body weight to press the pasta as thin as possible. Just like described above—you need to build the pasta in layers, folding it back over itself, and flattening again and again, about 4-6 folds. You will know when its ready when it is very smooth to your sight and touch; and you can roll it out thin enough to see your hand on the other side of the sheet. This method will take a bit longer, but is very achievable. Now cut and shape the dough with a knife or a pizza fough cutter If you’re not making filled pasta. Or you can purchase a Eppicotispai “Chitarra” Pasta Cutter with 32cm/12.5-Inch Rolling Pin
Note: Below is a link to one of the best homemade pasta making website I think I’ve ever seen. Because I am not standing next to you and teaching you hands-on, take a good look at this website. If I was going to design a pasta making photo montage, this is exactly how it would look– scroll all the way through for the best benefit.


Leave a comment